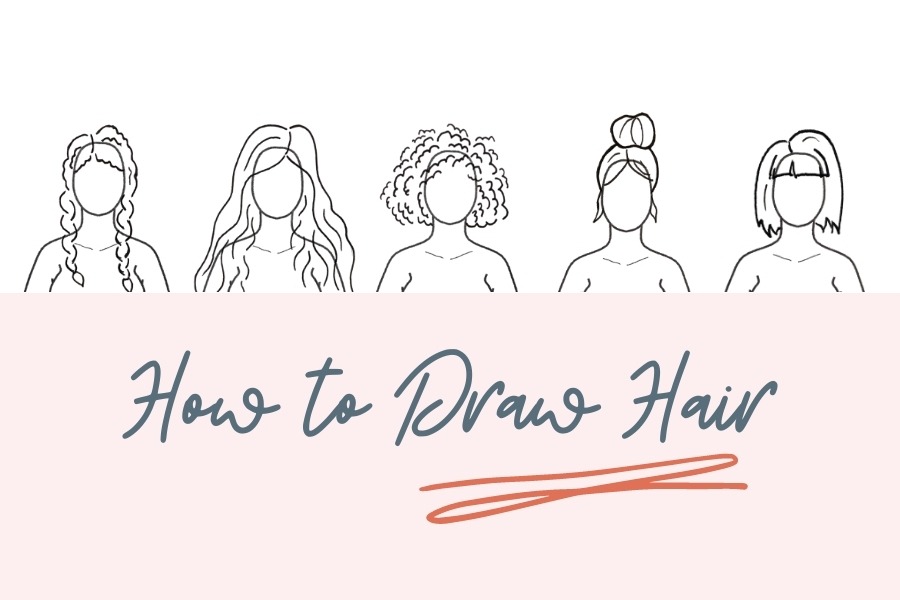
Why draw hair on your fashion illustrations?
Drawing hair on your body model fashion croquis templates can go a long way to making them feel even more “You.” Adding hair can also help you determine how different styles of clothing will look with your hairstyle length and cut!
Here’s a list of the Top 5 Tips we came up with for how to draw hair onto your fashion croquis templates. If you are a beginner to hairstyle drawing, or just in need of some helpful hacks, these basic “do’s” and “don’ts” can help you navigate the challenge of sketching out your hair. These simple and easy tips will help you depict different hairstyles on your fashion illustrations.
1. Draw the Hairline/Part FIRST
This should almost always be your first step; it will help you envision where the hair should fall from, and will help you think about the overall shape of your hair since the shape largely depends on the hairline.
- Do start the part slightly down the top of the head
- Don’t draw all hair above the face outline – your hair does not float atop or behind your head!

2. Add Volume
When drawing the outline of your hair, it’s important that you add volume to the hair, particularly along the part. No matter how flat or thin you think your hair is, no one’s hair falls completely flat from the part!
- Do elevate hair along the part
- Don’t draw hair flat on the head

3. Draw the General Outline or Shape of the Hair
The next step is defining the general shape of the hair. Drawing the outline in front of a mirror or using a photo of yourself can be helpful. This outline should be a simplified version of your overall hair shape, rather than trying to draw individual hairs. We recommend using a pencil first to make sure the outline looks correct, and then darkening it with an ink pen.
- Do keep it simple
- Don’t try to draw each individual hair

4. Pay Attention to the Hair’s Rhythm
Next, visualize (or look in the mirror!) the movement and flow of your hair. How does your hair fall from your part/head and how do segments form based on its rhythm? Add just a few strands to define these segments.
- Do divide the hair shape into large segments based on rhythm
- Do draw just a few strands that show the direction that your hair grows from your part/head
- Don’t draw the hair falling completely straight down from the part (even straight hair has more movement and irregularity than this!)

5. (Optional) Add Texture
This part’s exciting – but don’t go too crazy or you’ll risk overdoing it! We’ve found that the best way to add texture is by adding a few strands to each segment to emphasize and define the general surface and appearance of the hair. But, adding too many individual strands may cause it to start to look noodle-y or excessive. Your best bet is to keep it simple. Add strands where they help define the general shape and texture of the hair, and to leave those out that don’t add to the overall look. It also helps to add a few face-framing pieces. If you prefer a sleek hairstyle, then go ahead and skip the texture.
- Do add face-framing pieces
- Don’t make the hair outline completely smooth (unless you prefer a sleek look)

BONUS TIPS
Looking for more hair-specific tips? We’ve got you covered.
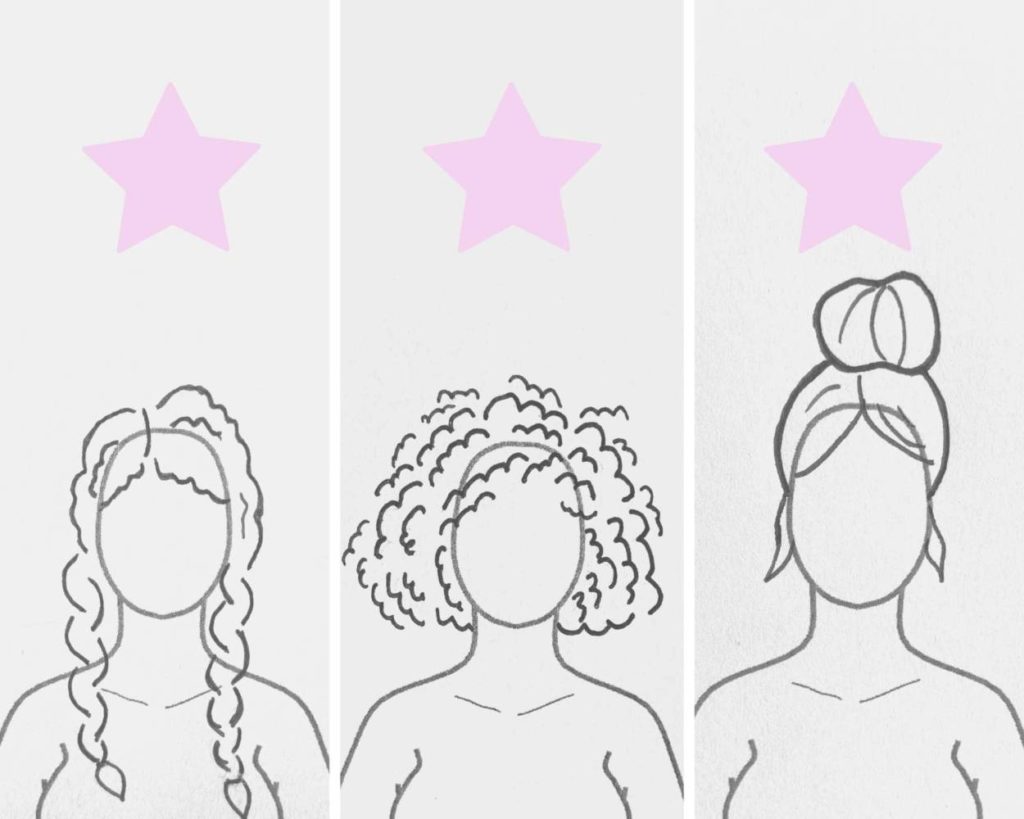
- Braids: Keep them simple! Don’t try to draw the intricacies of each strand in the braid, particularly if you don’t have experience drawing hair. If you do have experience and are up for the challenge, feel free to experiment and play around with different braid styles!
- Curly Hair: Add single strands to emphasize curls; think about which direction the curls travel from the part – do they move up and outwards, fall downwards, etc.
- Ponytails/Buns: Make sure the ponytail or bun is in view – do not just draw a bubble! Even if your ponytail/bun wouldn’t normally be seen from the front-facing position, it is important to define it because otherwise it may look like you have a short haircut.
Did you enjoy this post? Please pin and share!

Sarah is a college senior studying Psychology and Visual Arts. She is passionate about painting and expressing herself through personal style. Sarah is interning with MyBodyModel this summer and is excited to learn more about the maker experience.
6 thoughts on “How to Draw Hair: 5 Tips for Fashion Sketching”
Suggestions on drawing hair for someone who has a buzzed head but a very distinct widows peak? I know you don’t HAVE to draw hair, but that just kind of adds to the personal use of it all…thanks!
Hi, thanks so much for this blog post! I tried to sign up to receive the “24 Sample Hair Drawings” earlier this evening but never received the email. (Actually, I tried twice, just to make sure I did it right.)
Could you please send me a copy?
Hi, I too tried twice to sign up to receive the hair templates and have not received them. I purchased the premium credits, so i’m not sure if I did something wrong. Help. Have a good evening.
Same as the others — no template.
Same. It’s a year later and this is still a problem.
Great tips now to see what hair I have on MyBodyDouble.