Hi sewing pals! I’m so excited for my first blog with My Body Model and to show y’all how I use my personal croquis in my bullet journal sewing tracker for each month.
As I ramped up my sewing a few months ago, I started looking around online for a sewing journal I could use to keep track of how many things I made over the month, but I just couldn’t find anything that was exactly what I wanted. I had previously purchased a My Body Model croquis, but never got around to actually playing with it. I’ve had an obsession with bullet journaling without actually attempting it, but using one together with my croquis seemed like a good combination for a perfect sewing journal.
I know a lot of people use the croquis to plan out a garment they’re going to make, but right now I’m using them to document what I’ve sewn each month. You could make a page for just extra special makes, but I really wanted to see what my output each month was, and as well as have a sewing scrapbook of sorts, so I’ve been making a page for every garment I sew each month.
Even though I use these pages after I sew, they could just as easily be used for planning pages that you incorporate throughout your monthly bullet journal spread.
Organizing my bullet journal sewing tracker spreads
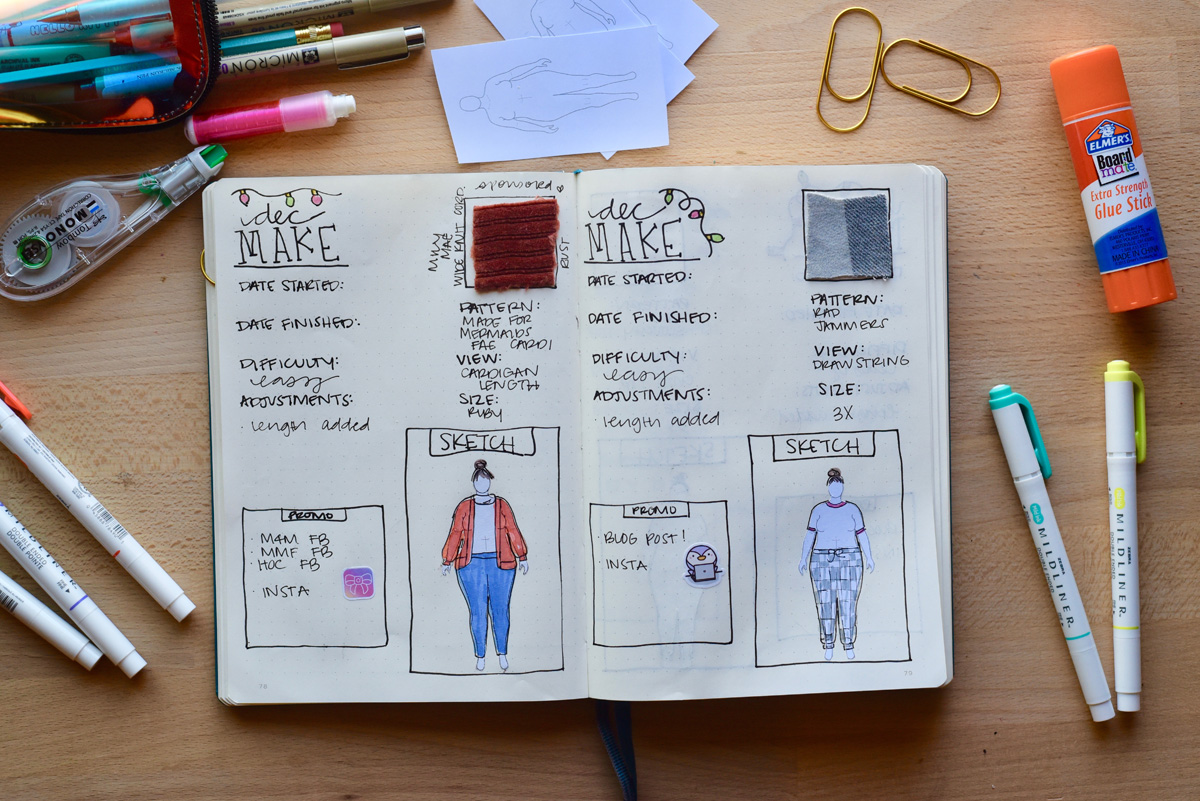
Since my sewing pages are for documenting what I’ve sewn at the end of each month, I put them at the end of my monthly spreads in my bullet journal. When I started these I came up with a page layout, and so far I’ve only tweaked the sizes of the boxes, I really love it as is so far.
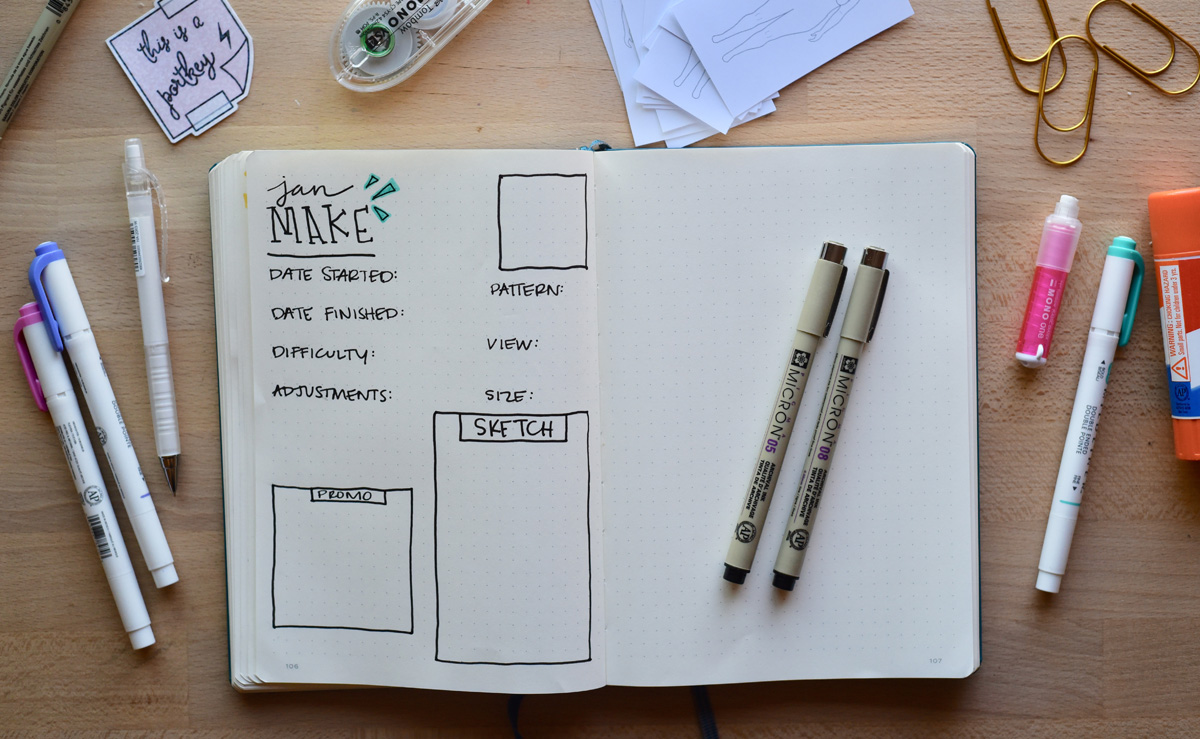
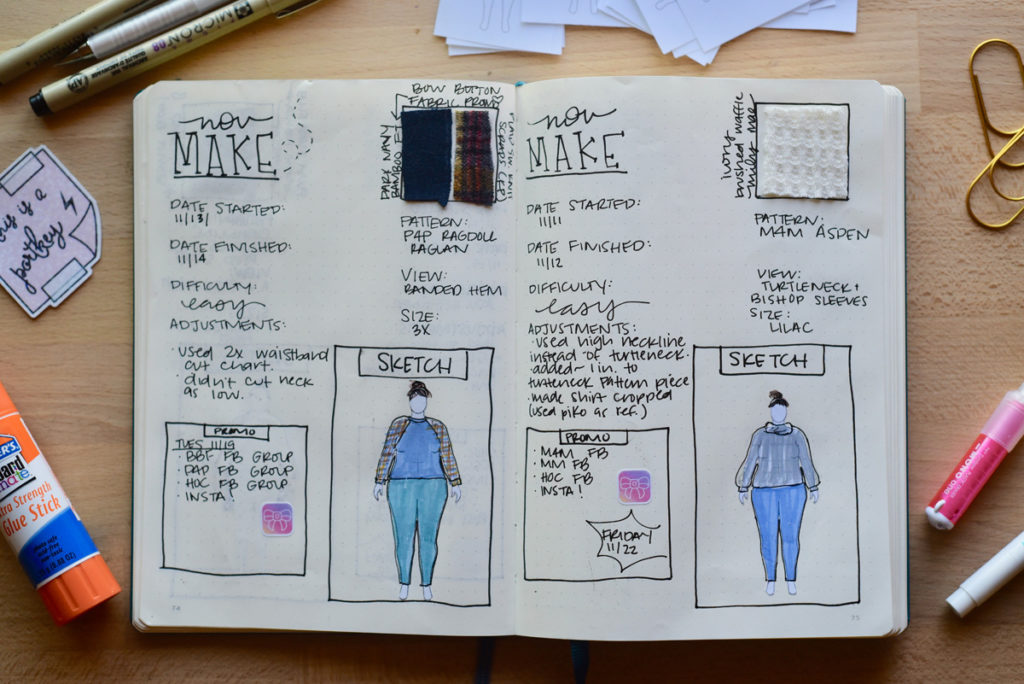
I start by drawing 3 boxes on each of my Make pages:
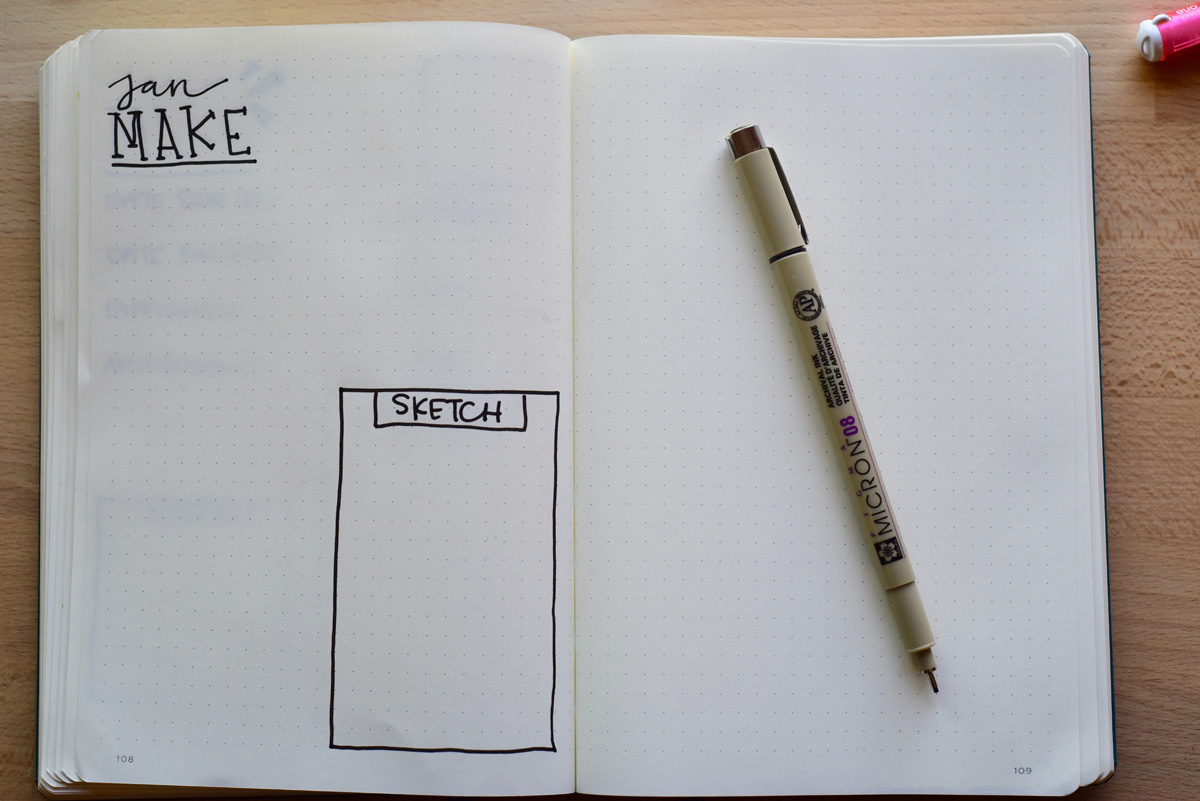
- a large box at the bottom right for my croquis and sketch of the make (20 dots X 13 dots) – hands down this is my favorite part of the page. It makes it feel like a sketchbook of sorts, and I get to feel like I’m being artistic even though I can barely draw stick figures.
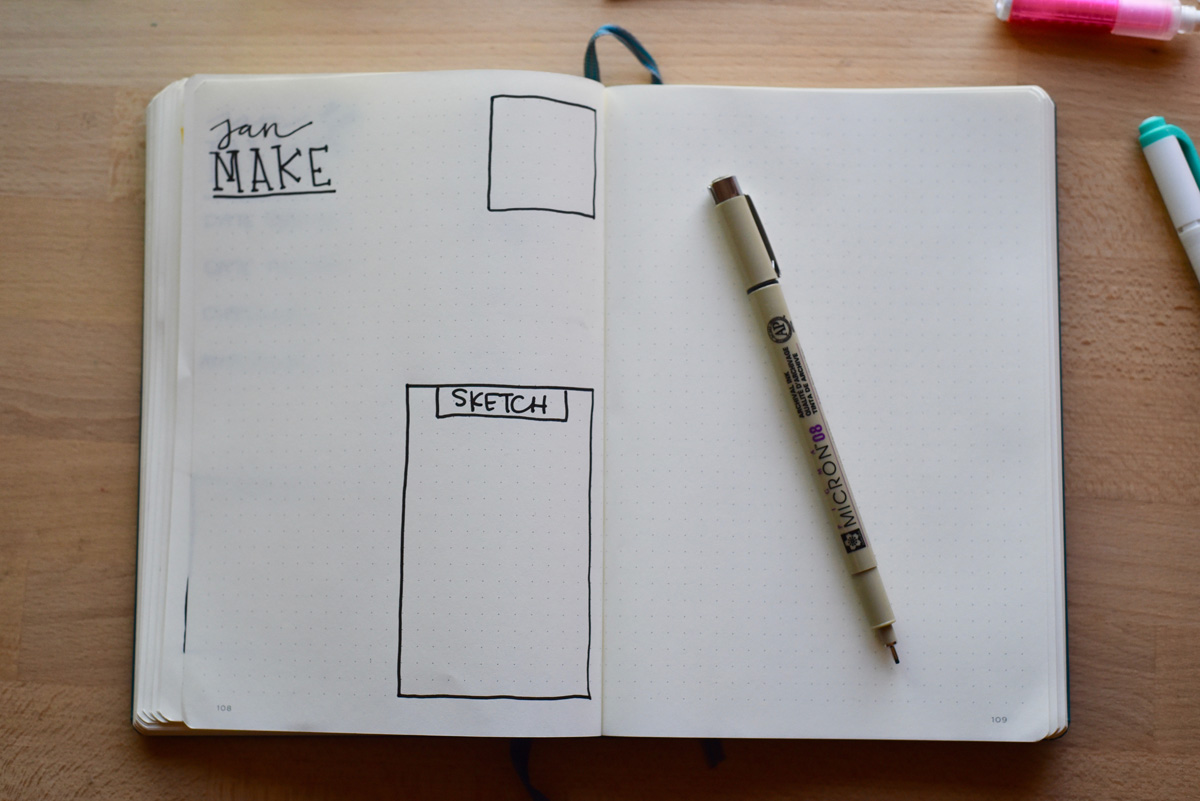
- a small box at the upper right for a fabric swatch (8 dots X 8 dots) – I love being able to touch the fabric I used when looking back, it gives the page a scrapbook feel, and as a lover of all things stationary…it makes my heart happy.
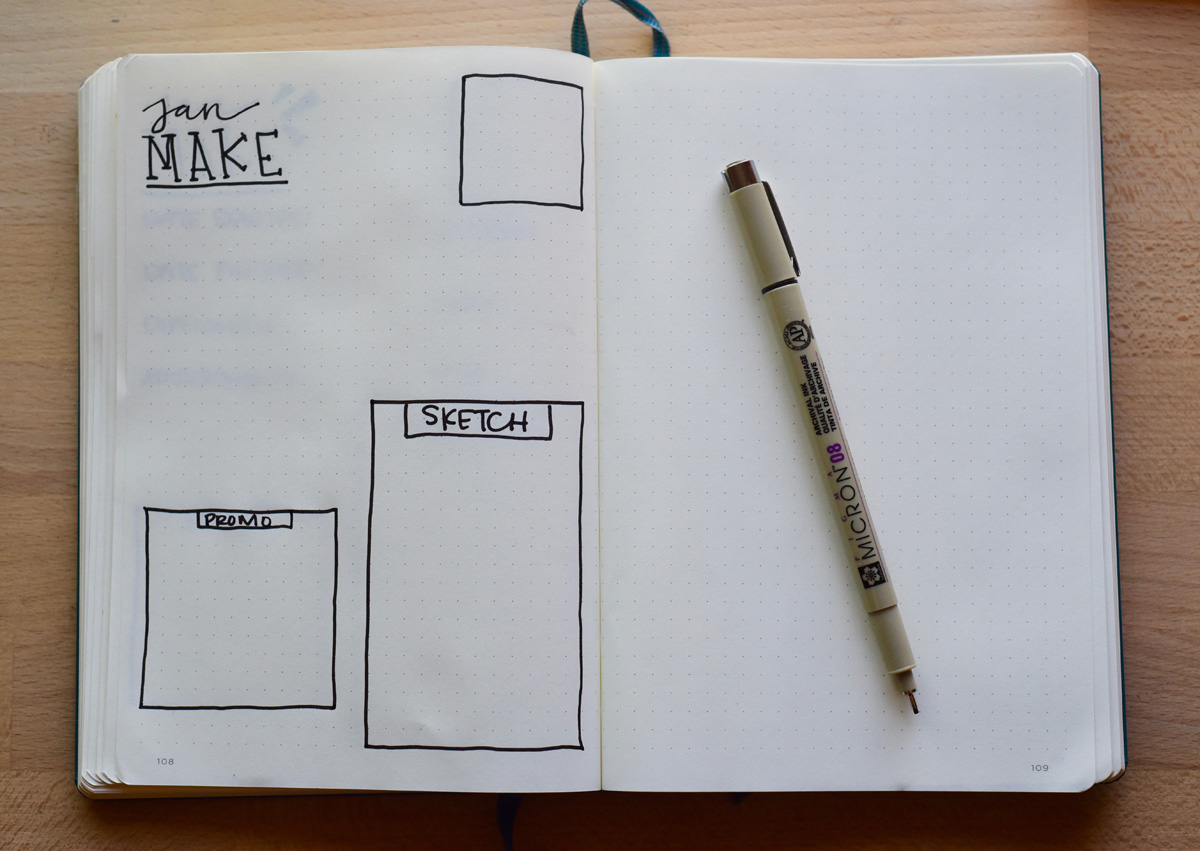
- a medium size box at the bottom left for keeping track of where I have to post the makes (12 dots X 12 dots) – some of the clothes I make are in collaboration with fabric companies, or are for pattern tests that require being posted in certain Facebook groups and/or to Instagram and this is an easy way to quickly see what goes where.
Then I add the information that I want to track for garment that I make. The information you document for each make can be whatever you want, but so far I’ve gone with these focal points:
- date started
- date finished
- difficulty
- adjustments – I write the adjustments I made as well as any I would make in the future
- pattern name
- view
- size
Adding my body model croquis to my bullet journal sewing tracker
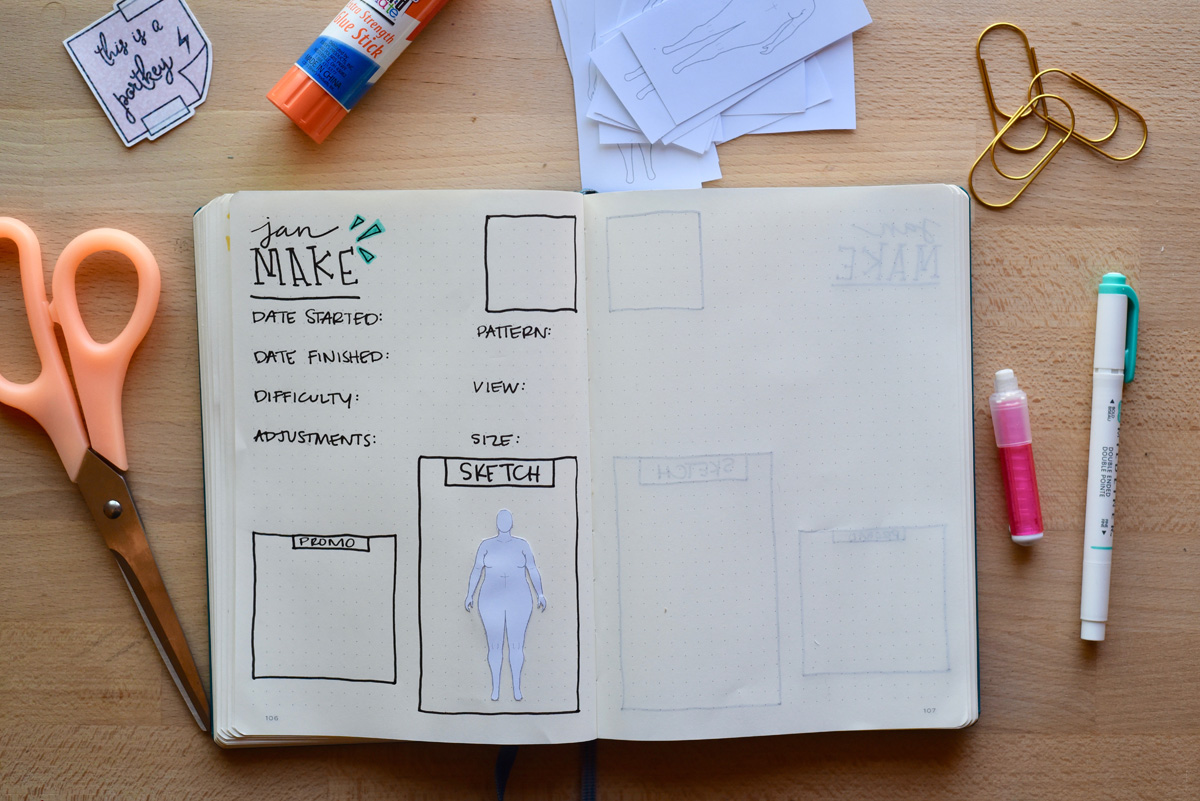
My final step is to cut and paste my body model croquis to the sketch box on each sewing tracker page.
If you follow my setup dimensions exactly, printing page 9 (the 12 models per page format) from your MyBodyModel printable fashion sketchbook with your croquis at 115% scale will give you appropriately sized croquis to fit in your sketch box.
I’ve spent a lot of time printing and reprinting to figure out the size they need to be, and I’ve found that scale to be the sweet spot with the box dimensions I draw. Once you have your croquis printed to the appropriate size, cut them out and glue them on, it’s that easy!
Here’s what the final page setup looks like:
Supplies for my bullet journal & sewing tracker
If you like the look of my bullet journal, and want to dip your toes in with me, here’s a list of the supplies I use in mine:
- Journal: Leuchtturm 1917 Medium A5 dotted journal in pacific green
- Pens: these pens for my lines and writing in various sizes (08 for box outlines and upper left header; 05 for information points; and 02 for filling in the information)
- Markers: (I have this pack & this pack) because I love that they’re colorful yet still subdued, which I find makes them easier to look cohesive with the page. As I color in more clothes, I am noticing that I could use more colors, but these two sets have been working for me so far.
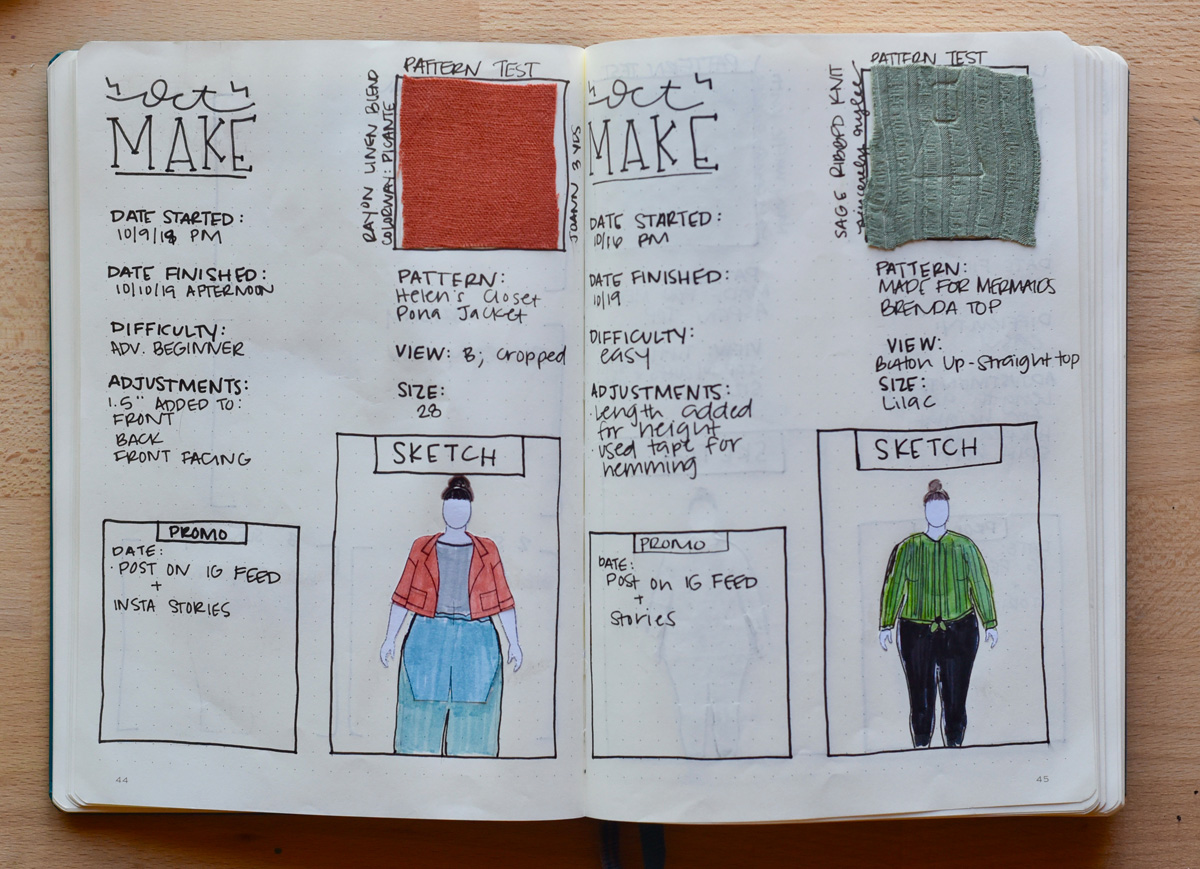
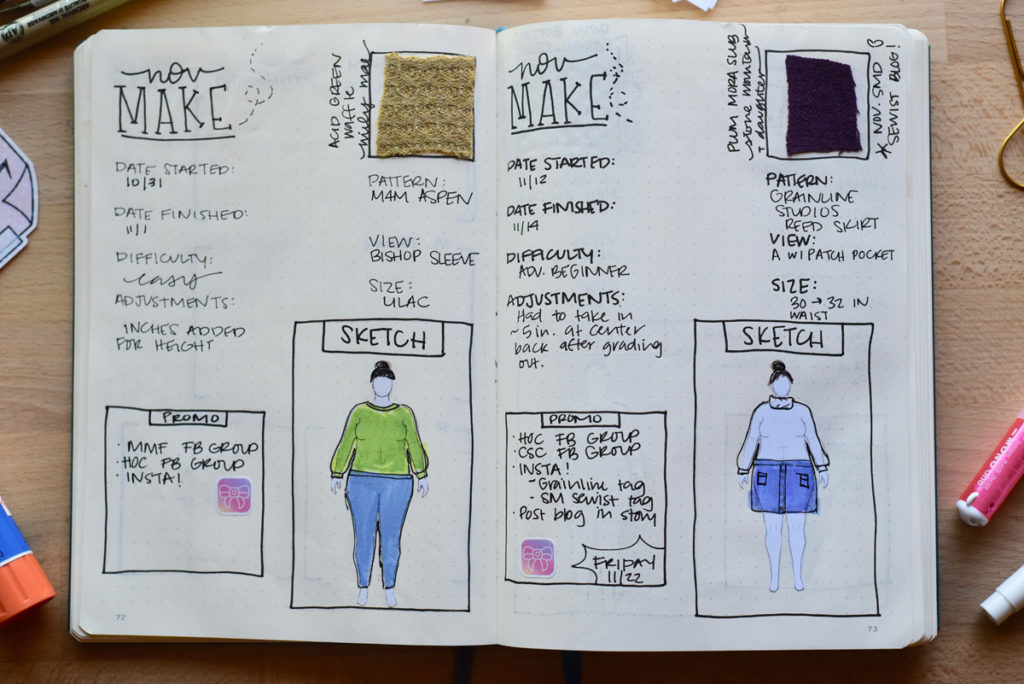
Here’s what the pages look like when they’re completed:
Benefits of sketching & tracking my makes
After the first month of using my body model croquis to document my makes, I was hooked.
- I love being able to look back at what I’ve achieved over the month.
- I like seeing my basic drawing skills slowly (VERY slowly) improve as I continue drawing out my makes.
- Seeing all of my clothes I make in one place really helps me to see any patterns I find myself being drawn to, as well as favorite fabric bases and colorways.
- I’m able to see what my style was like that month and if it stayed the same or changed throughout the months.
- It’s also kind of therapeutic to draw clothes onto a body scaled to look like mine, which wasn’t something I thought would happen. I find myself being less critical when I see my body in the mirror, because I’ve spent so long looking at little croquis with the same shape in my journal. It’s helping to turn my body from something I pick apart to something I see for what it is…just my body.
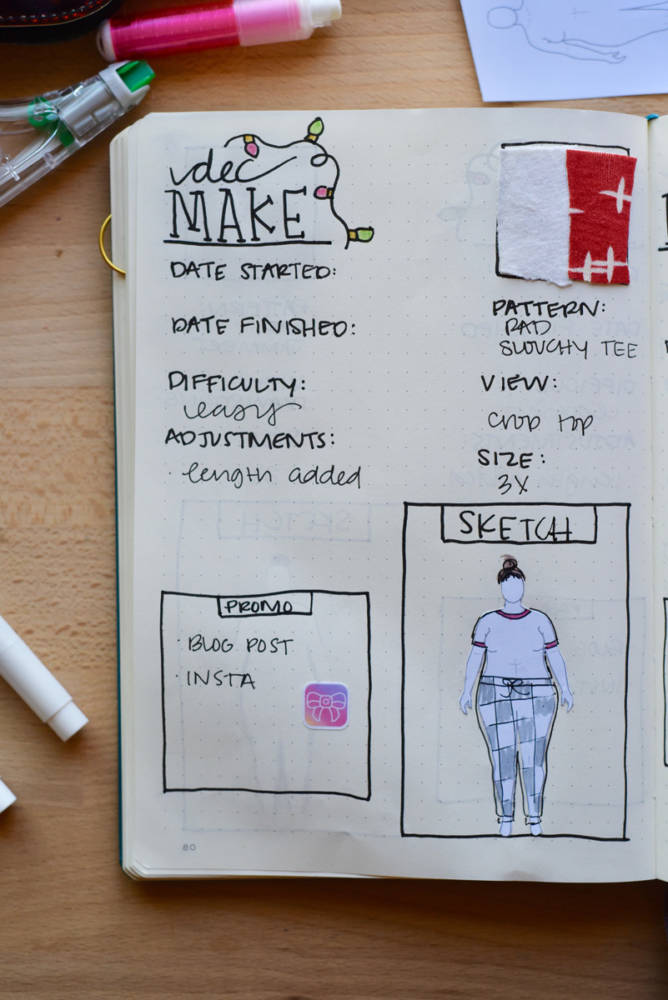
I can’t wait to see how my sewing pages in my bullet journal grow in 2020. I’ve only been using my bullet journal for 4 months in 2019 and it’s been so good for my sewing progress and my self confidence, so I can’t wait to see where I am with it this time next year.
Do you have a sewing bullet journal? If not, are you going to start one in 2020?
I’d love to see your setups! Tag me on Instagram @threadyforit so I can get some bullet journal inspo from y’all too!
Happy New Year + happy sewing y’all,
Leanne
For more bullet journal and planner/tracker inspiration, check out these blog posts:
My Personalized Sewing Planner, by Elana
Making rubber stamps of My Body Model for my bullet journal, by Micheline
31 Days of Outfit Sketches, by Ciara
Leanne is a native New Orleanian who currently calls Phoenix home with her husband and two cats. She began sewing over 2 years ago and it’s quickly become an integral part of her self care journey. Sewing has given Leanne so much self confidence and self love, and she’s proud to say that the only RTW items in her wardrobe are undergarments and jeans- something she hopes to tackle in 2020. Leanne’s favorite thing to do while sewing is listen to podcasts or catch up on her latest show obsession. In 2019 Leanne taught herself to quilt and knit, and she’s excited to add these crafts to her arsenal along with garment sewing. You can follow along on all of her crafty adventures on Instagram or her blog.
![It looks so good on the model… but how will it look on ME?
Our friend Julie uses her croquis as a virtual fitting room for internet clothing shopping. Turns out that MyBodyModel is just as fun to use for choosing ready-to-wear clothing as it is for creating your own garments!
Here’s what she had to say:
“Drawing sketches on my me-shaped template is a way to virtually “try on” clothing before I buy and choose which styles to order, when overwhelmed with all the possible choices the web offers.
My preference for not-so-conservative fashions on my not-so-conservative body, can be tricky, and I’ll admit, there have been a large number of speedy returns in the history of my online shopping. But lately MyBodyModel has been coming in handy.”
MyBodyModel has been helping and guiding in making better shopping decisions since day one. 🏆
#SewingPlanner #MyBodyModel #FashionSketching #BulletJournal #SketchAndSew #MyBodyModelStyle #SewingProcess #SewingSketch #FibreMood
[Image description: A grid that features a row of ready to wear outfits above a row of similarly sketched outfits on Julie’s croquis. ]](https://www.mybodymodel.com/wp-content/plugins/instagram-feed/img/placeholder.png)
9 thoughts on “How I use MyBodyModel with my bullet journal sewing tracker, by Leanne”
I love the way you are using your pages to document your makes!
I have lots of fun sketching out potential makes – but, being realistic, they sometimes have very little detail and very little resemblance to a final make 😆
I’ve never been good at consistently documenting my makes (and I’ve been at it over 40 years 😯). I think that if I could come up with a printable page like this, to fit in a binder, without having to recreate the template every time, I could maybe keep up with myself 😉
I definitely need to incorporate adjustments, notes for next time and where I want to post (especially with relevant challenge and “so50…” hashtags…
Now I wish I had some graphic design skills…
Thank you for sharing this!
Hi Heather!
Making a printable version would be such a good idea for having these pages ready and waiting to be used! I like doodling/stationary so I don’t mind setting it up every time- thankfully!
For now, you could always sketch up a page with pen and paper and then have copies made and punch holes for a binder!
My drawings don’t look exactly like the final either, but they’re always close enough that I can see them in my closet when I look at my sketches.
Your hashtag note reminds me that I need to add a page in my journal for all the sewing hashtags I need to use because I always forget some!
I hope you make some photocopy pages- I’d love to see your sketches on Insta!
Leanne
Hi Leanne,
I absolutely LOVE this idea! I bought a dotted bullet journal last year and haven’t started using it yet because I felt a bit overwhelmed with all the bujo resources online, but I’m so obsessed with the idea of tracking my sewing projects this way.
I often forget what size I may have traced a pattern in or what adjustments I may have made… or even what hacks I did to it, or how long it took me. So I’m definitely going to have a go at doing something like this. It looks like the perfect creative project to get me feeling inspired again.
I’ve started doing this digitally on Trello, but personally, I love the idea of getting arts ‘n craftsy and having something physically in front of me like this. A keepsake I could treasure for years to come.
Thanks for sharing your wonderful idea!
– Raylene
Hi Raylene!
There are SO many bujo inspo sources floating around, which is awesome but I get really overwhelmed by them all too! I found the easiest way to start is to just keep it simple and something easy to keep up with! I love that since you’re making it yourself you can customize your sewing pages to be whatever you need them to be! It’s really handy to have all the information in one place, and make the pages gets me inspired to sew more…so it’s a win win!
This sewing tracker is so fun to make and looks like a lot more effort than it was, a perfect way to dip your toes into the world of bullet journaling! Let me know if you have anymore questions, I hope you try it out…I’d love to see your sewing tracker!
Leanne
This is so brilliant! Such a great way to organize all of your sewing makes and take the time to also appreciate your growth in sewing for yourself as well.
Pingback: Serenity + Sewing Journal - Love Notions Sewing Patterns
I always have a hard time keeping track/planning because I can never be bothered to replicate a complicated layout to follow. I love how simple yet effective this is.
Random Q but what do you use to secure the fabric swatches to the pages without damaging the journal page on the other side?
I’ve just started a bullet journal to organise my thoughts – I literally started this last week (Jan 18th 2021) so obviously this month has been simple to start with.
But, I crochet a lot and am starting to set up a small business to start selling items, and have been thinking of a way to track my makes – this sounds like a fantastic idea (so far I have just used a simple project task list which I may end up using in Feb), getting used to this way of doing things – I used to have a diary to track deadlines at University and found that was really useful, since working in a job where everything was in outlook calendars, I haven’t needed to do this much anymore – until now! I am obsessed with the idea of setting up a small business and have been for the past three years! Well, I have jumped the gun and hope that the BJO method will help me get started in all my goals this year.
Thank you for sharing!
Jasmine H.
IG:@jaz_crafts FB:@jazcraftsuk
I have been using MyBodyModel for years to sketch out ideas to see if I like them on my body. Your way of using it to track what you actually make is the first one, I’ve seen that will work for me. I bought the items you recommend and have just created my first page. Thank you for reposting this