Today’s guest blog post is by Tina, who was one of our testers for the new omit-bust croquis option. Tina shares how she used the new feature to create a personal fashion croquis that beautifully reflects her body after a unilateral mastectomy. As a visual artist who also drafts many of her own patterns, Tina also gives us a look into her inspiring creative process. She shares her tools and techniques, and how she’s used her custom croquis to create garments that are lovingly designed for her body.
This is my body. It is not a Ready-To-Wear body. It has carried me through breast cancer. It has one breast, and it has a swollen left arm (lymphedema), so my body does not fit into the clothes hanging on the racks in the shops, but it is My Body and I love it.
Because of surgery and treatment my body has gone through major changes and three quarters of the clothes in my wardrobe no longer fit me. My body asymmetry has made it near impossible for me to find anything in the shops that I feel comfortable in, so I started sewing an entirely new wardrobe. Sewing is my therapy and it’s my way of embracing and loving my new body as it is. Sewing is a way for me to somehow feel in control of an uncontrollable situation by making clothes that makes me feel happy, and the MyBodyModel croquis is a great way for me to test out what dress shapes works with my post mastectomy body before I cut into fabric and sew.
I am used to drawing design flats and technical drawings and have previously free-hand drawn croquis models to illustrate the artistic feel of a garment, but fighting cancer has been an emotional rollercoaster ride, so lately I haven’t been able to draw clothes for myself without my emotions taking over. Then I was contacted by Erica, who asked me if I was interested in testing the MyBodyModel croquis. I didn’t have to draw my own body, I just entered my matter of fact measurements into the form and my body model appeared on screen. It was a therapeutic experience seeing my body in a neutral rendition, and it made me realize; if this is how my body is, not seen through my emotional glasses, then everything is okay.
” I just entered my matter of fact measurements into the form and my body model appeared on screen. It was a therapeutic experience seeing my body in a neutral rendition, and it made me realize; if this is how my body is, not seen through my emotional glasses, then everything is okay.”
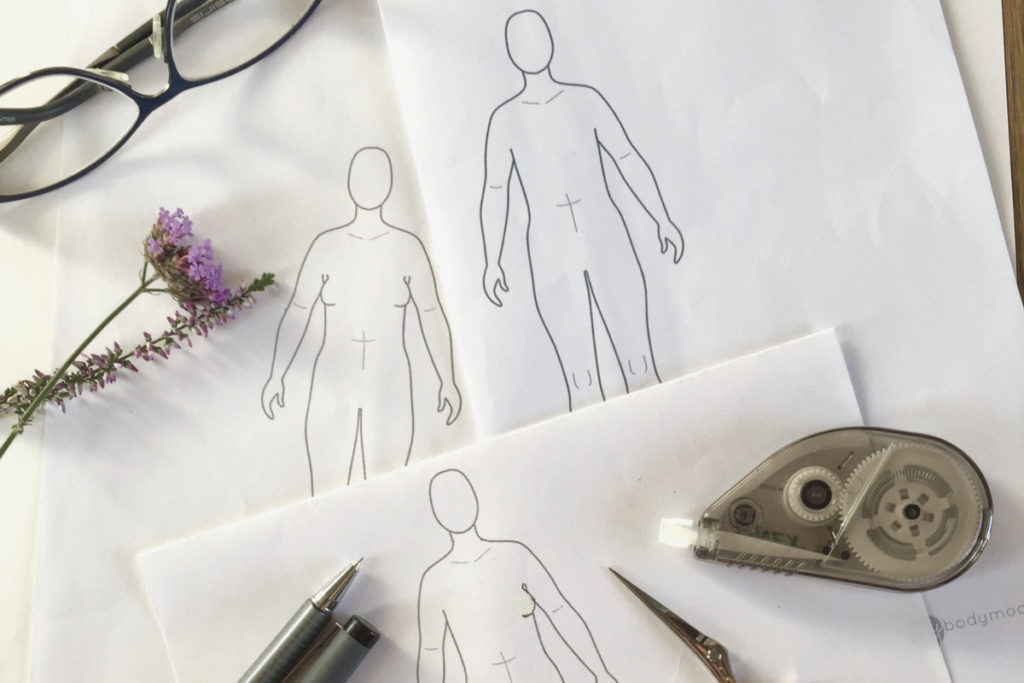
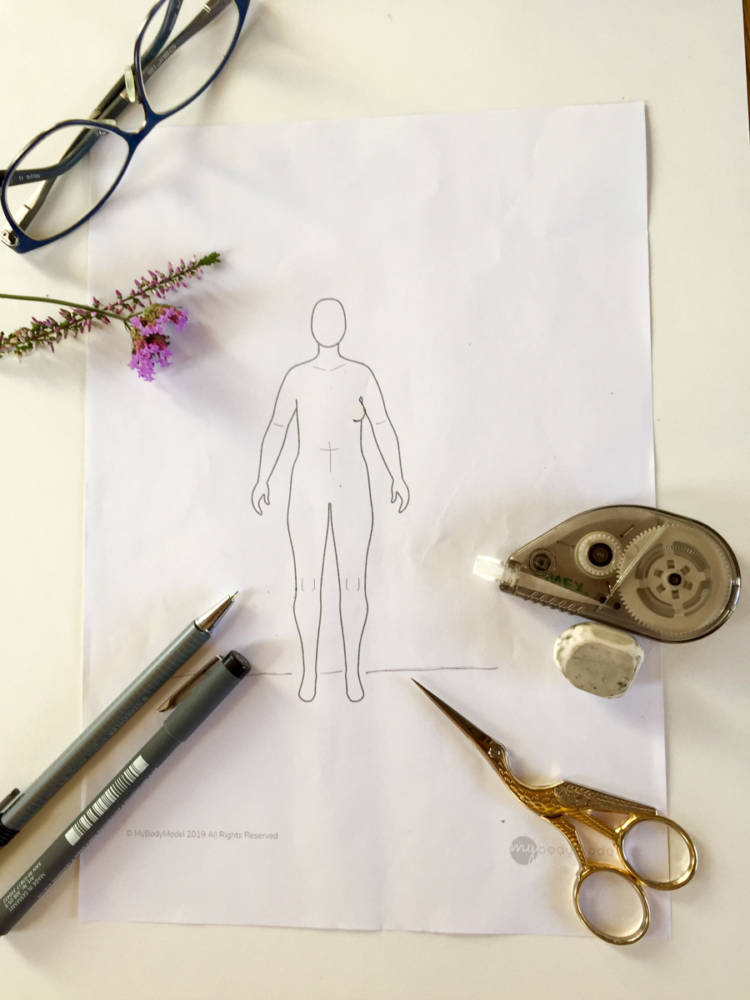
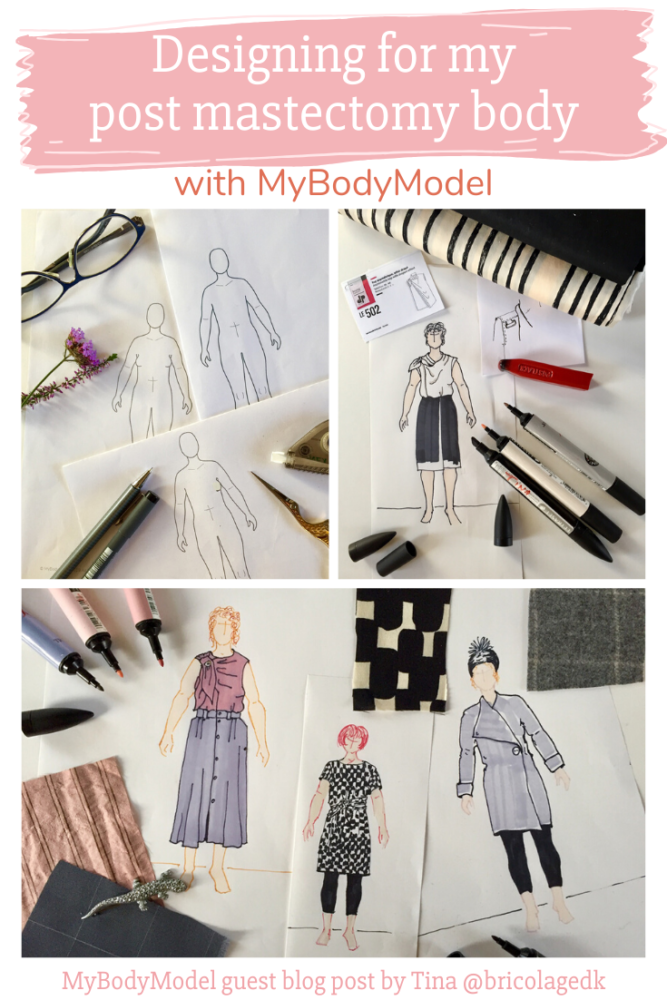
How I made an asymmetric body model
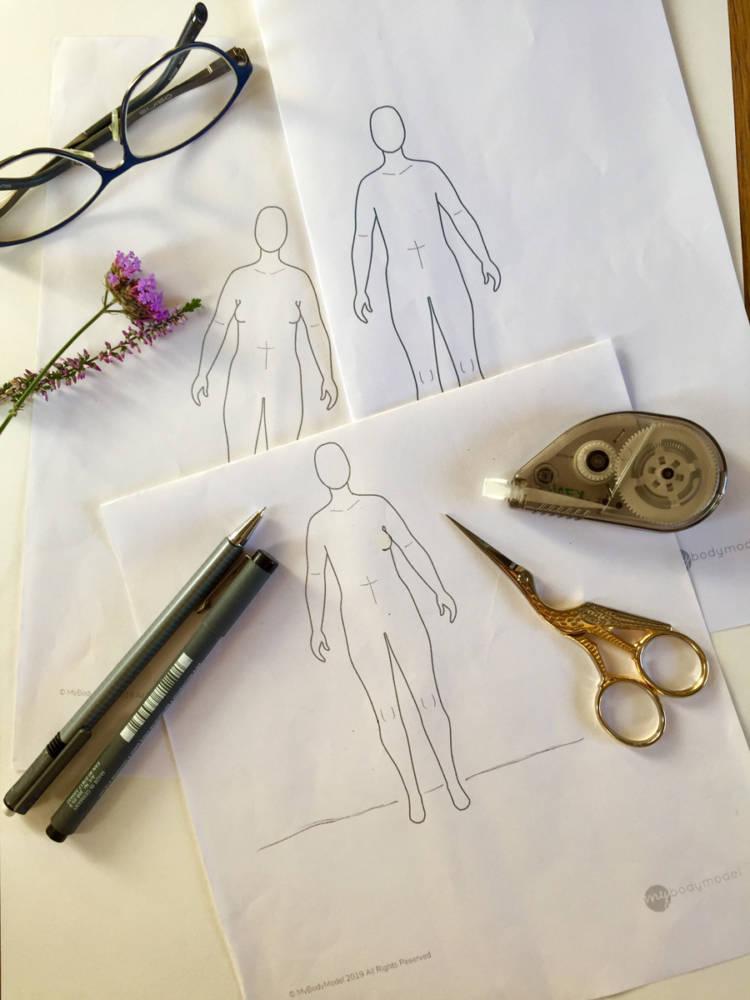
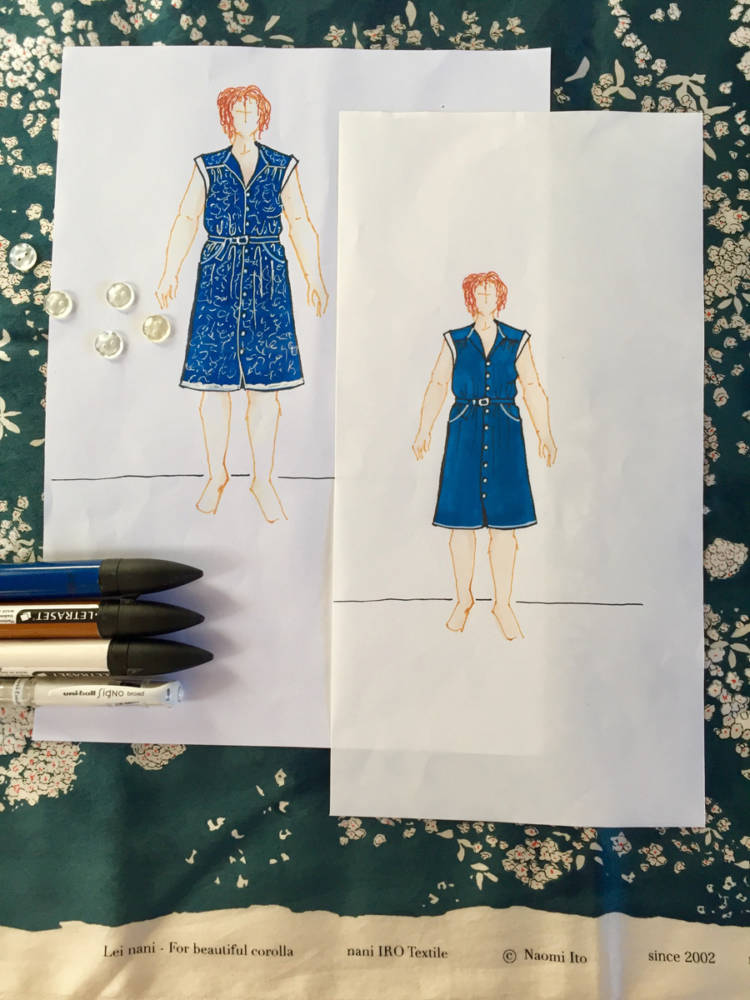
To make my-asymmetric-bodymodel I printed one croquis with bust and one with the omit-bust option. Then I placed the omit-bust model on top of the with-bust model, taped them onto a window (placing them on a lightbox will also work) so light shone through, and drew one breast onto the omit-bust croquis. Finally, I used tipp-ex tape to remove the straight line underneath the bust. Now, I can just run my half-flat model through the photocopier and scale it as I wish. I chose to mirror my croquis, so when I draw it is just like looking in the mirror.
I love how realistic a view the croquis gives of what the style will look like on my post mastectomy body, so now I use mybodymodel for design sketches before I decide to sew the piece, and it has proven a very useful design tool for me.
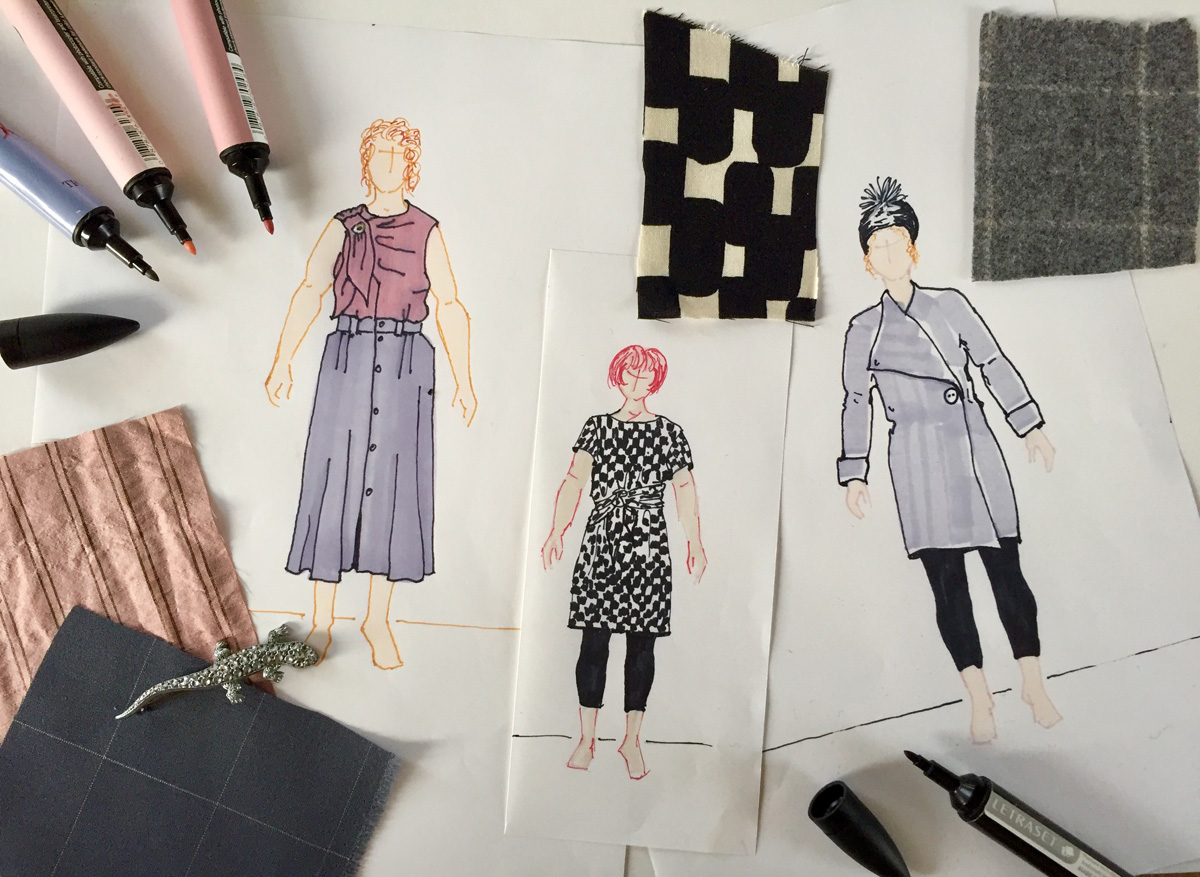
How I use markers to outline the body
Sometimes I outline the body in a similar colour to the skin. This way I create a bigger difference between the garment and the model, and it is easier for me to focus my eyes on how colours, fit and texture of the dress will work for me.
Sometimes I outline the body in black. The black outline “binds” the body and the clothes together and makes it easier for me to decide what the out-fit will look like on my body.

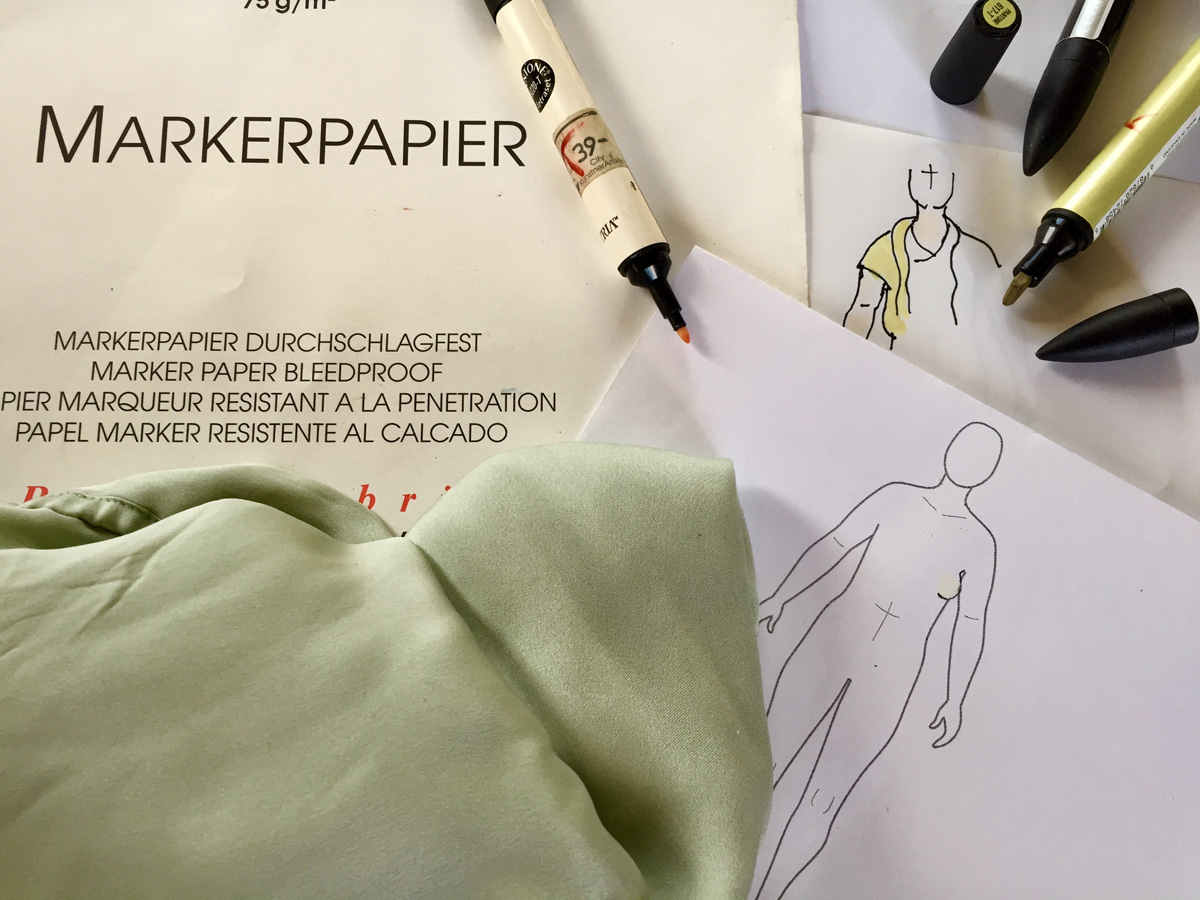
How I use an underlay croquis
I use the croquis as an underlay model under bleedproof marker paper, which is more transparent than ordinary drawing paper. The marker pens are Letraset Pantone markers with three different tips in one pen. They are refillable, and mine has lasted for 20 years.
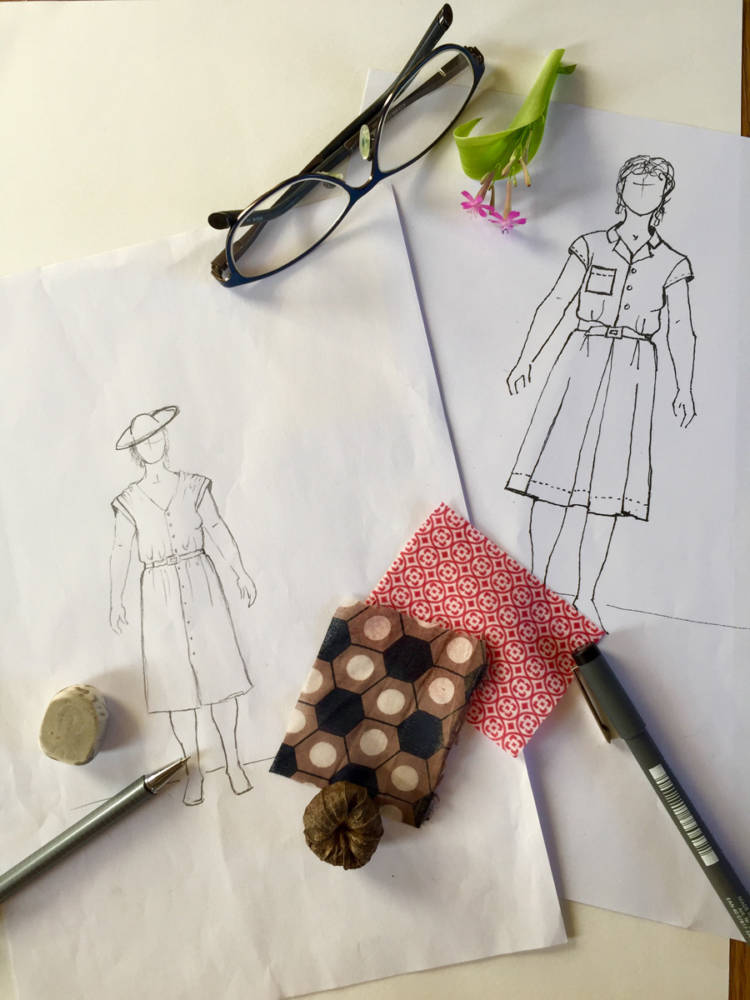
How I use pencil and pen
I like to do a croquis in pencil (0.5) or black pen (0.05 tip) just to get an overall idea of the design, and to decide on details, stitches etc. before I start using my marker pens.
Clothes that I like
I have tested and tried all sorts of sewing patterns and found that with my asymmetric body, I just feel most comfortable in vertically asymmetric clothes if the garment is in one colour, or fabrics with busy designs if the sewing pattern isn’t asymmetric. Skirts with an interesting cut or fabric also draws the attention away from my upper body. Emphasizing my waist, and adding gathers or pleats to the shoulder seam, creates volume on my upper body. Pockets or a brooch on my flat side enhances the asymmetry. I love wearing tops with a cowl or long ends for tying in a bow, as well as jackets with big collars. Drawing on my personal croquis helps me to experiment with these design features and visualize how they will look on my post mastectomy body.
“Drawing on my personal croquis helps me to experiment with these design features and visualize how they will look on my post mastectomy body.”
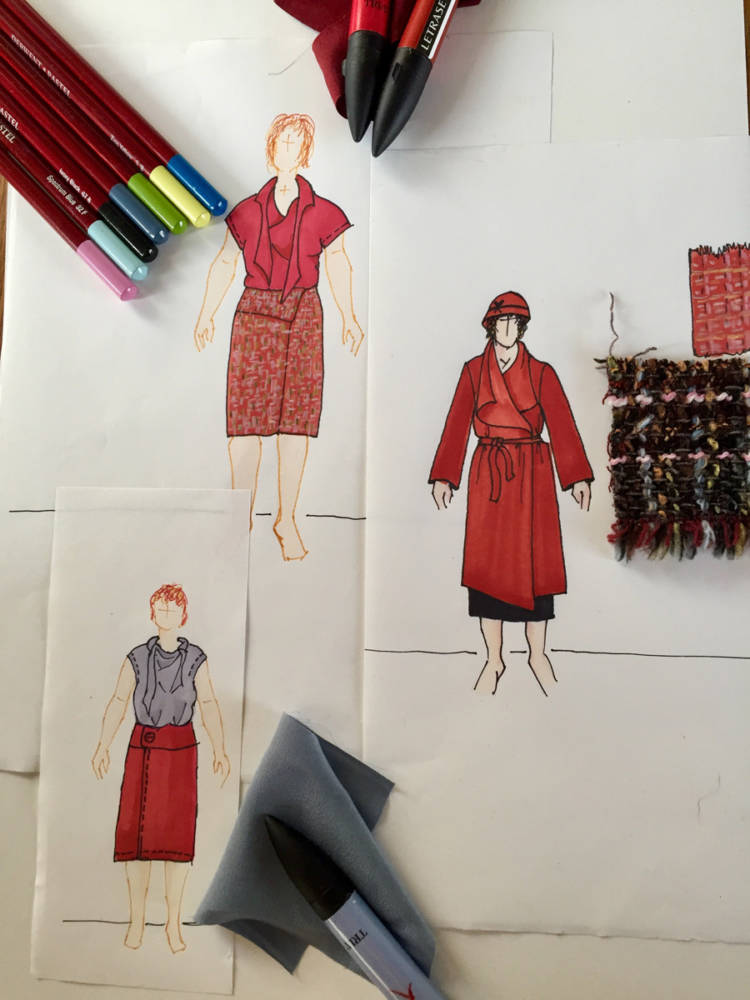
For the details on the woolen fabric I have used Derwent pastel pencils. Most of these photos are sketches for fall that I have made before deciding what to sew.
I have a few different designs for tops, dresses and skirts that I sew over and over again, and mybodymodel is a great way for me to mix and match and decide on fabric, fit and colour before starting to sew.
Photos are by @schjermers_collager
Fabric is from metermeterdk, Stofhallen and stof2000
Patterns: dp_studiofashion Le502 top. The Jacket in the red collection is the Mantel Westerland from Schnittquelle. The shirtdress with chest pocket is the burdastyle pattern 6520 (the pocket is my own addition). The tweed skirt in the red collection is burdastyle pattern #111 01/2018. The rest of the patterns are drafted by yours truly.
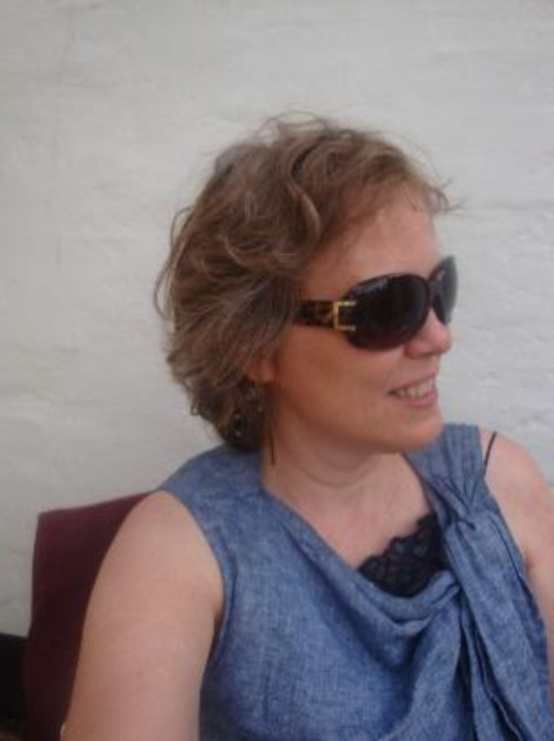
Hi, I’m Tina. I live with my teenage son in Copenhagen, Denmark. I love all things textile and sewing is in my blood: I started out in 1968 sleeping in my cot placed on the cutting table of my grandparent’s beach wear factory, and I have never looked back since. I have a degree in design management and have worked with fashion and design in all sorts of ways. I have drafted patterns for and sewn everything from ballet tutus to chemo turbans, done weaving, embroidery, knitting, dyeing etc. If it includes textiles, I have to have a go at it. Because of a breast cancer diagnosis in 2017 and the following treatment my body has changed drastically, and now I draft patterns that fits my new body and sew to make wonderful clothes that I feel happy and comfortable in. I also love to do artwork with acrylics and water colours, read Danish antiquarian books and do a bit of gardening.
5 thoughts on “Designing for my post mastectomy body with my body model croquis, by Tina”
Thank you for posting. I loved reading about your journey and your sketches are lovely.
Hi Kathleen,
Thank you, so much for your kind words.
All my best Tina
Your drawings are awe-inspiring as is your positive body image. I have a question about your technique. You use a blank croqui underneath your marker paper. Do you then draw the body shape onto your top layer before you start adding your clothing? I’m still figuring out what method works best for me and your tips are very helpful. Thank you.
Thank you so much 😊 I do enjoy doing these drawings.
Before I make the final fashion drawing, I sketch the design with pencil to get the right feel and drape. Then I do a new drawing in a black marker pen point 0.05 to decide on details and stitching.
Then I do the final fashion illustration on the marker paper, which is so transparent that I can see the croquis body outline through the paper (the mybodymodel croquis is printed in black). So, I draw the clothes first with marker pen, then add the head, arms and legs/feet in my chosen colour. Then I add colour to the clothes followed by colouring the body and face, both with my Pantone markers. I finish off with the hair. In case I have made the head too small I can always make it look larger with more hair 😊.
I wish you all the best with your drawings
Pingback: Sewing resources for breast cancer patients during treatment and recovery compiled by Tina and shared with Sew Over 50 | Susan Young Sewing