After years of imagining clothes on unrealistic figures, Amanda has completely transformed her fashion sketching process to design in a way that honors her body and style. She shares her personal fashion journey, and walks us through her updated sketching process for “trying on” new designs, pattern hacks, & outfit ideas with confidence.
“The MyBodyModel croquis is really like a grown-up paper doll that helps you appreciate your own proportions and plan your sewing projects in a way that honors your unique form.”
– Amanda
I was introduced to the traditional nine-head fashion croquis as a recent high school grad, when I attended a fashion sketching workshop at the Fashion Institute of Design and Merchandising. I managed to hang onto the paper template they gave me for many years, and I got a lot of practice drawing clothes on these exaggerated fashion figures. For the most part these designs lived on paper for fun and creative expression, and it didn’t really occur to me that I could bring them to life for everyday wear.
Fast forward to 2020, when I was finishing college as the pandemic hit. I got a sewing machine a month into lockdown, which ended up being one of the wisest decisions I’ve ever made! I signed up for the local company Seamwork’s Design Your Wardrobe program to give me a place to start in making my own clothes, and there I was introduced to MyBodyModel.
I was so used to working with idealized figures and, coming from a costuming and ‘editorial fashion’ place, it really was a shift to think about what sewing projects that suited my real body, and my real lifestyle, could look like. I was really impressed with how the measurements created an accurate line drawing, and for the first time I was really able to see the lines of my body instead of imagining clothes on an unrealistic ideal.
About a year into my wardrobe sewing journey, I stumbled into the world of Kibbe body typing, a personal styling system based on the book Metamorphosis by David Kibbe. In a nutshell, the Kibbe system rejects the idea that people should try to fit an ideal figure (i.e. a skinny hourglass), but rather provides a spectrum of different physical archetypes that can help you understand your own proportions. The key to great personal style in the Kibbe philosophy is making the most of your own unique balance of visual elements: vertical vs. horizontal lines, width vs. narrowness, curved vs. straight lines, etc. There is no one ideal to strive for other than your own best self.
It’s a great system, but one of its biggest flaws is that it’s not easy for most people to be able to see themselves objectively. Kibbe experts often recommend drawing the shape of your body over a photograph of yourself, but MyBodyModel takes that idea to the next level.
Ultimately, I’ve learned it’s not necessarily as important to know which specific Kibbe type you fit in as much as it is to understand how to dress your own individual proportions and shapes. The MyBodyModel croquis is really like a grown-up paper doll that helps you appreciate your own proportions and plan your sewing projects in a way that honors your unique form.
“For the first time I was really able to see the lines of my body instead of imagining clothes on an unrealistic ideal.”
– Amanda
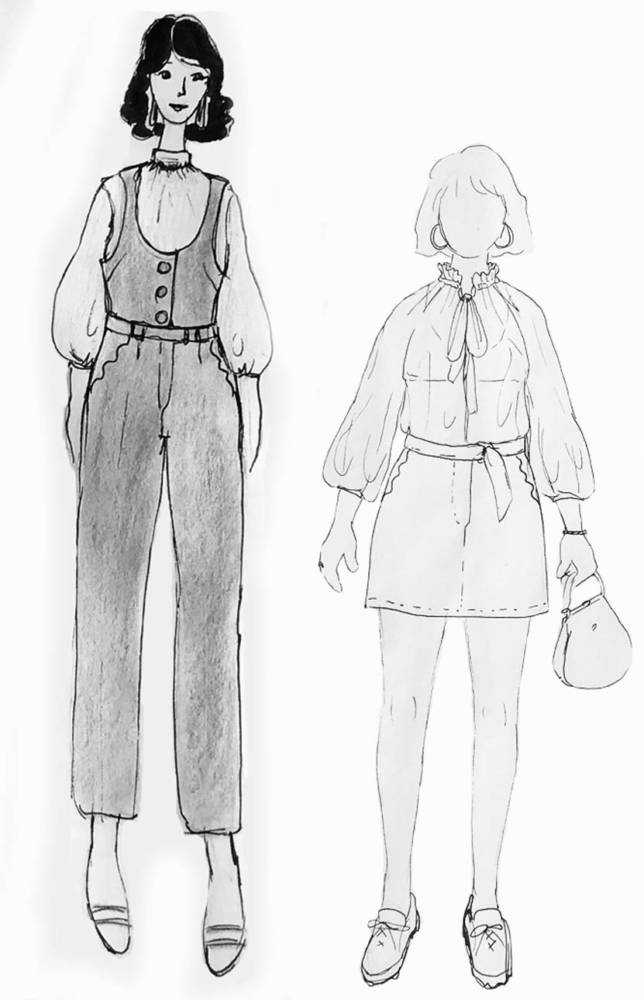
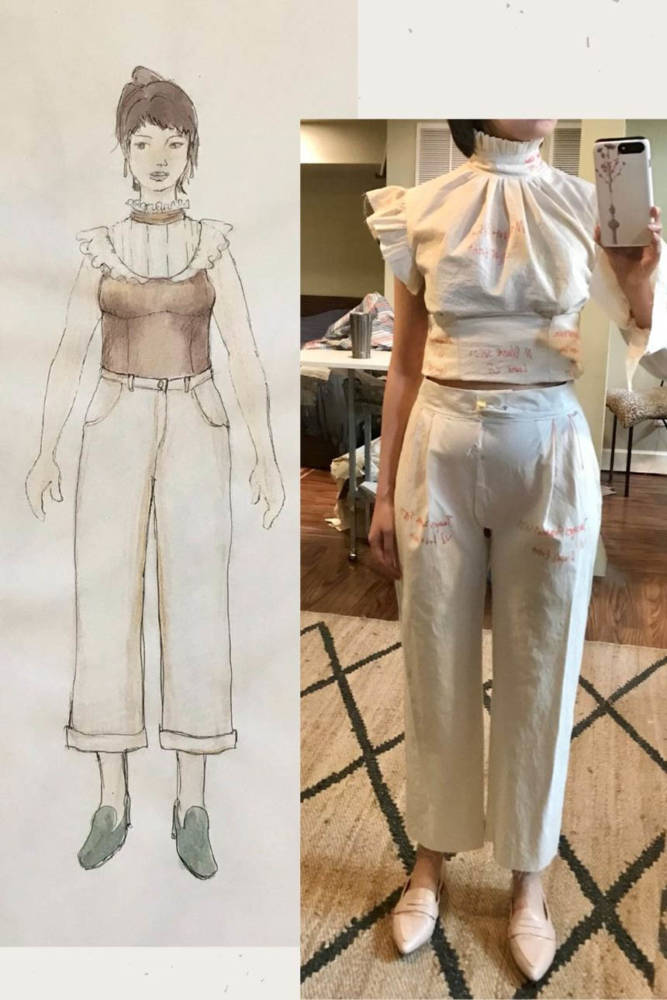
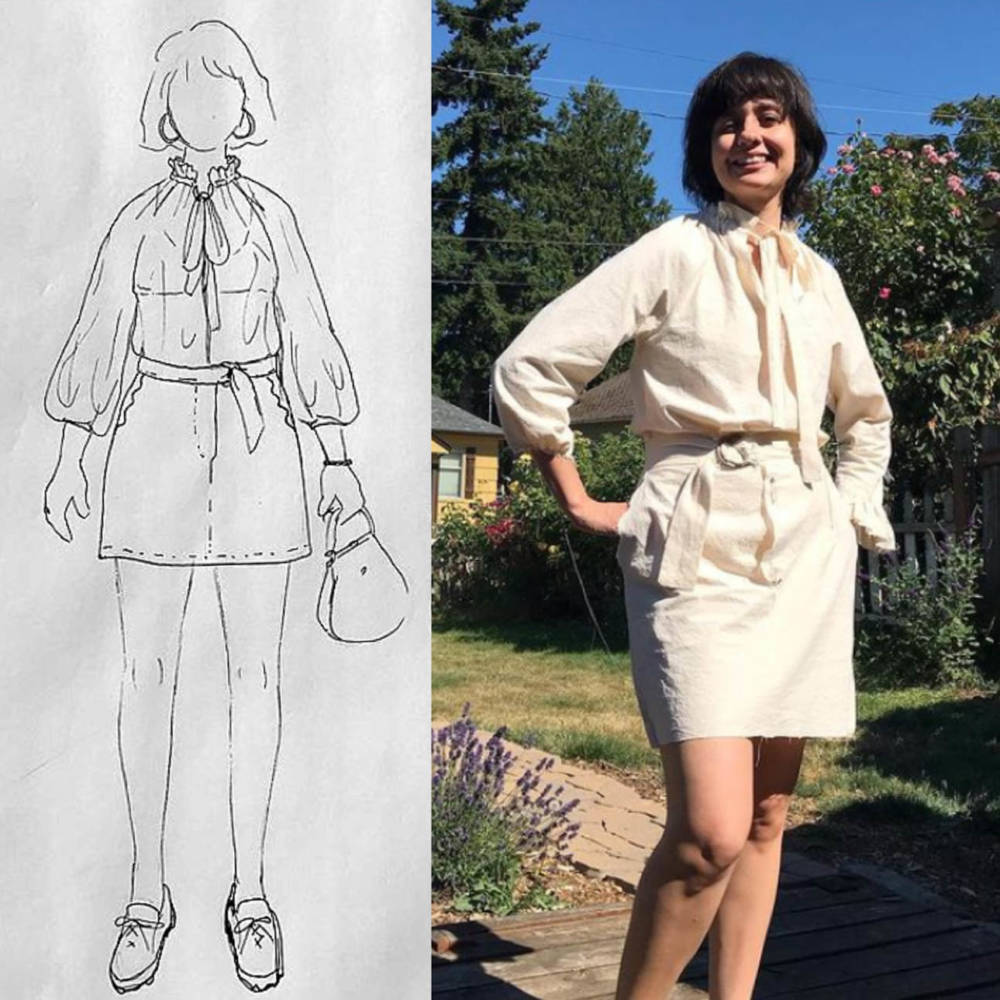
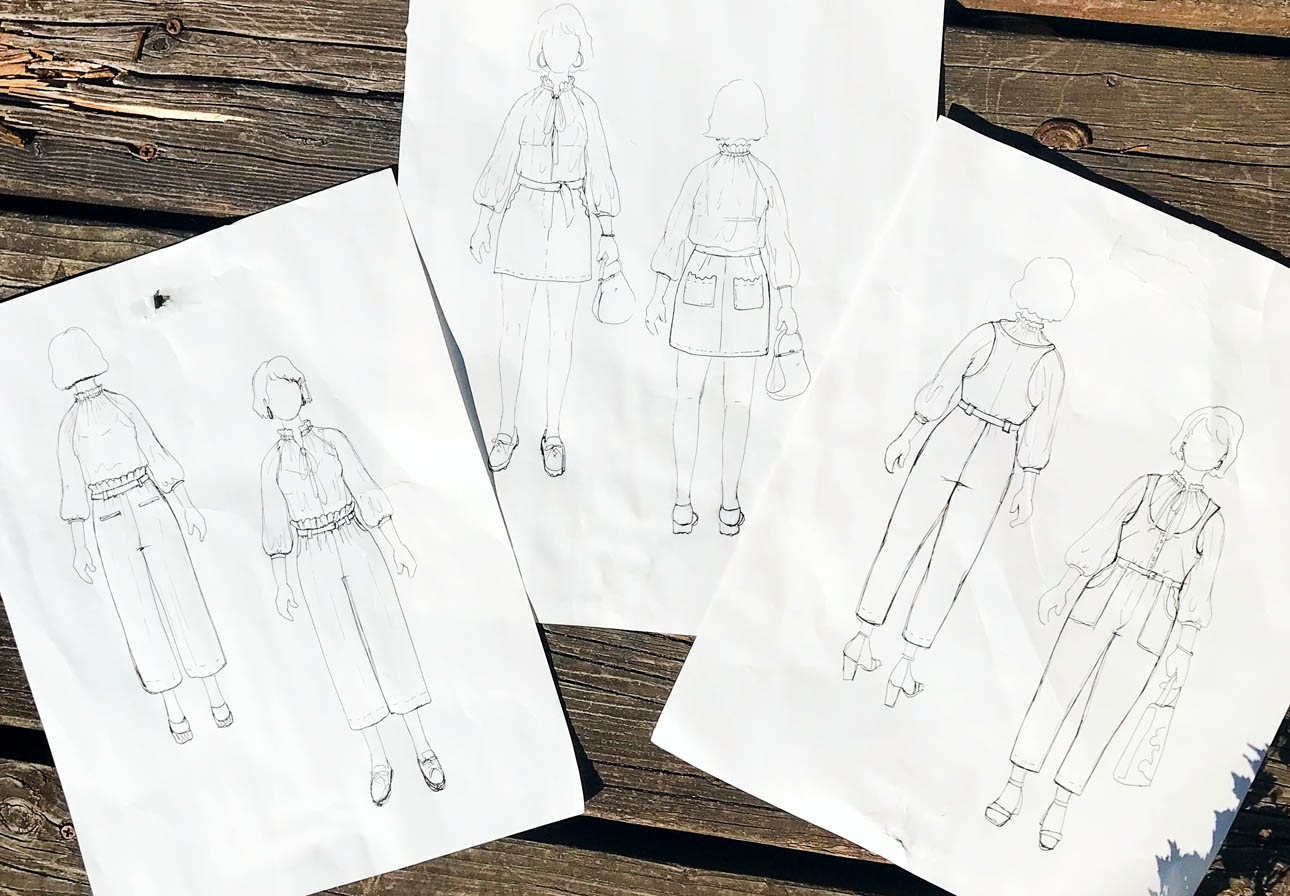
Along with my sketching process, making a toile in muslin is an important step to see how proportions work in a full ensemble. Here you can see some of my sketches and toiles side by side:
My Design Sketching Process
Though my sketching process was more structured when I started out, recently I’ve been focusing on sewing for the love of creativity. Nowadays, it depends on the project as to whether I use drawing to come up with the initial idea or somewhere else along the way of making a garment.
Since the MyBodyModel template makes it very quick to have an accurate figure of myself, I love that I’m able to quickly create multiple sketches as an idea evolves.
One of my favorite time-saving tricks using MyBodyModel is to use quick sketches to ‘try on’ patterns I’m thinking of buying or for trying different outfit combinations together. Sometimes it’s all for the sake of dreaming, and other times I use what’s in my closet. It’s perfect for those moments when it would feel like too much work to try on a lot of things, but I still need to figure out how to style a me-made garment.
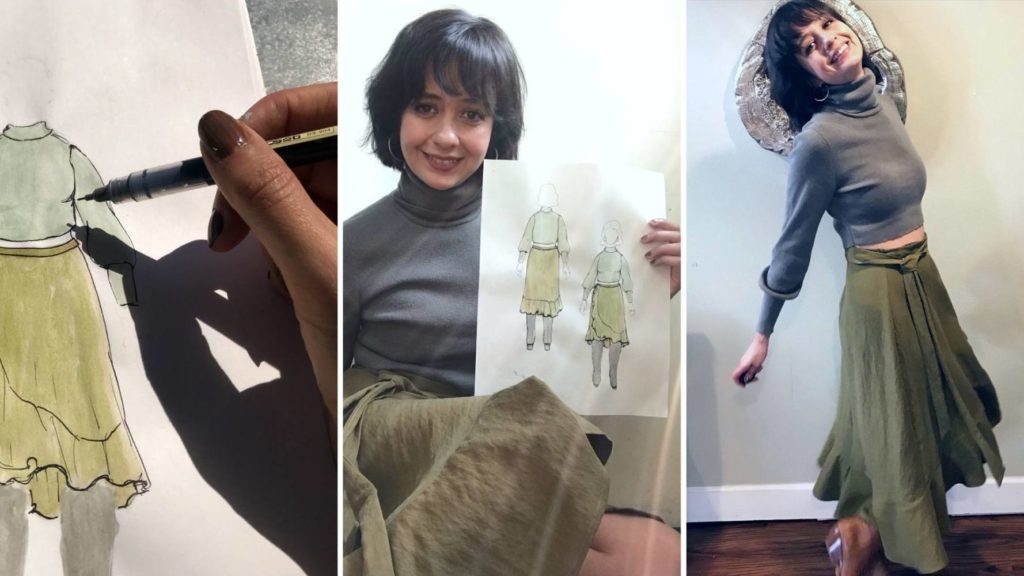
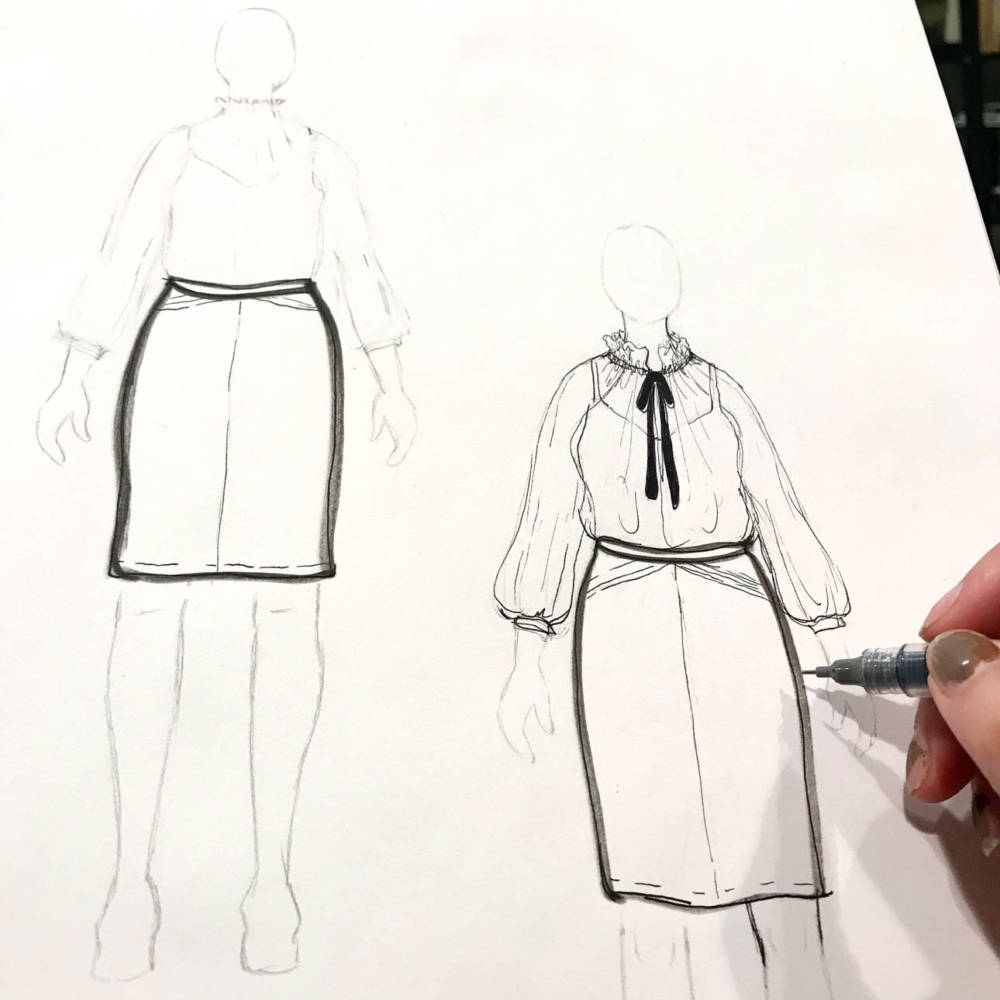
I still use the first (well-loved) MyBodyModel I printed out, and for everyday sketching I simply place it under my sketchbook page and start tracing. If I want to do something more polished, I’ll secure the paper underneath with drafting dots.
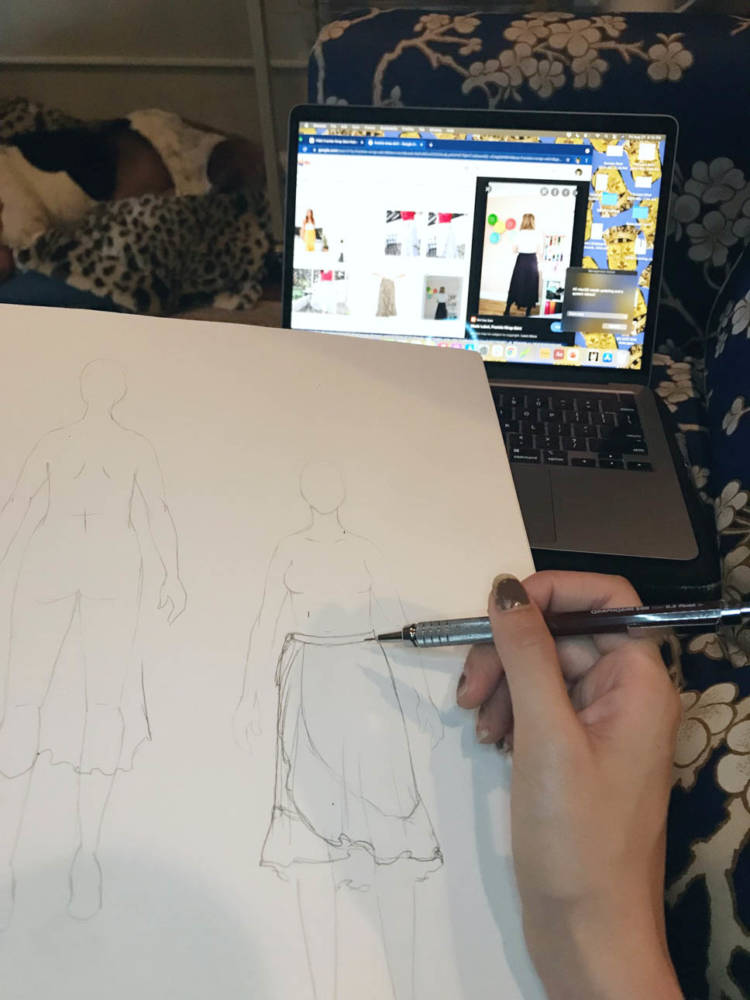
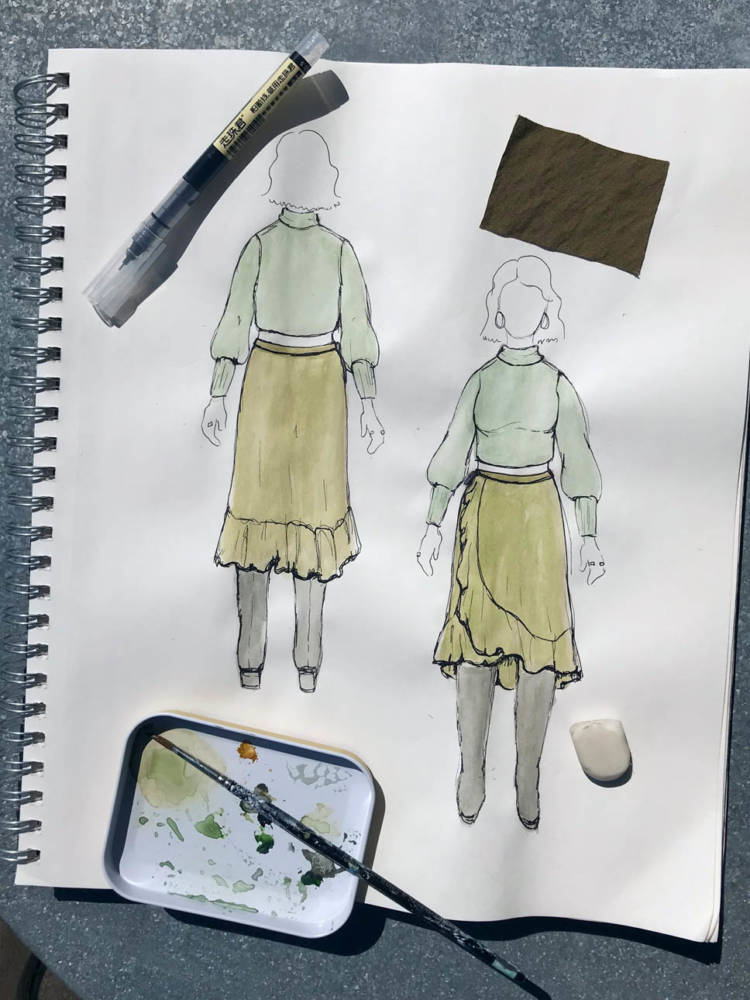
I start with mechanical pencil, and once I have my shapes down I’ll erase most of the pencil. If I’m doing full color, I’ll add it at this point. I mostly use colored pencils and watercolor pencils, but for this sketch I added some traditional watercolor.
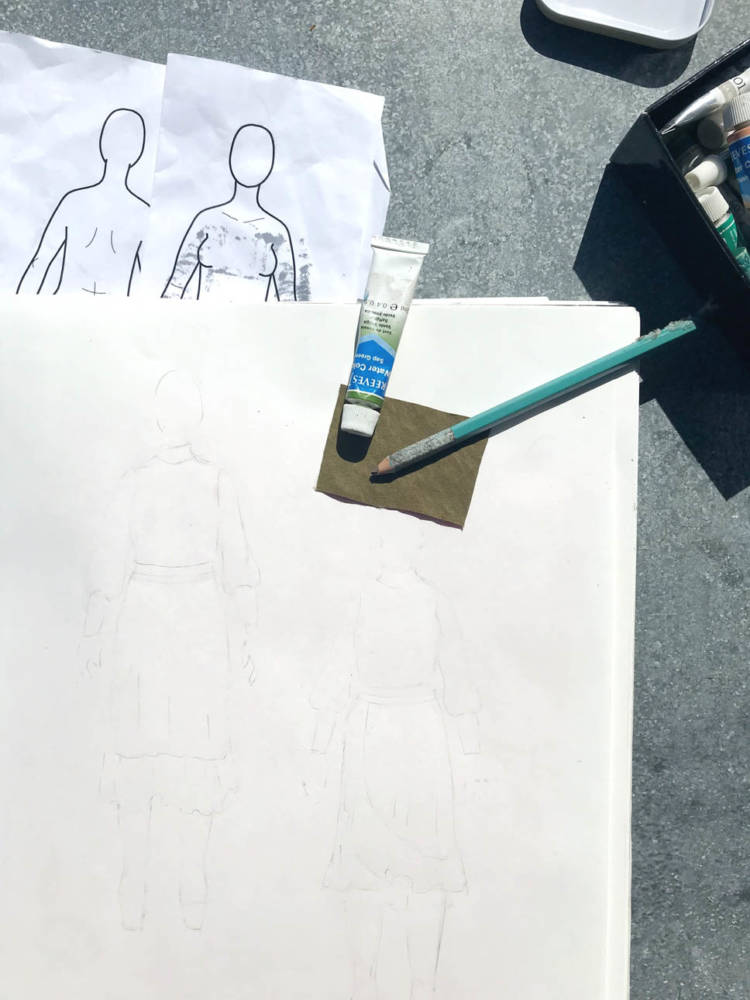
After the color is down, I go in with pens of a couple of different widths to trace over my pencil lines and add dimension to the drawing. I start with a very fine tip over all of the original pencil lines then carefully erase any extra pencil. I then add depth with a wider pen to the heavier parts of the garments, i.e. the hems, and to bring out folds, pleats, and other details.

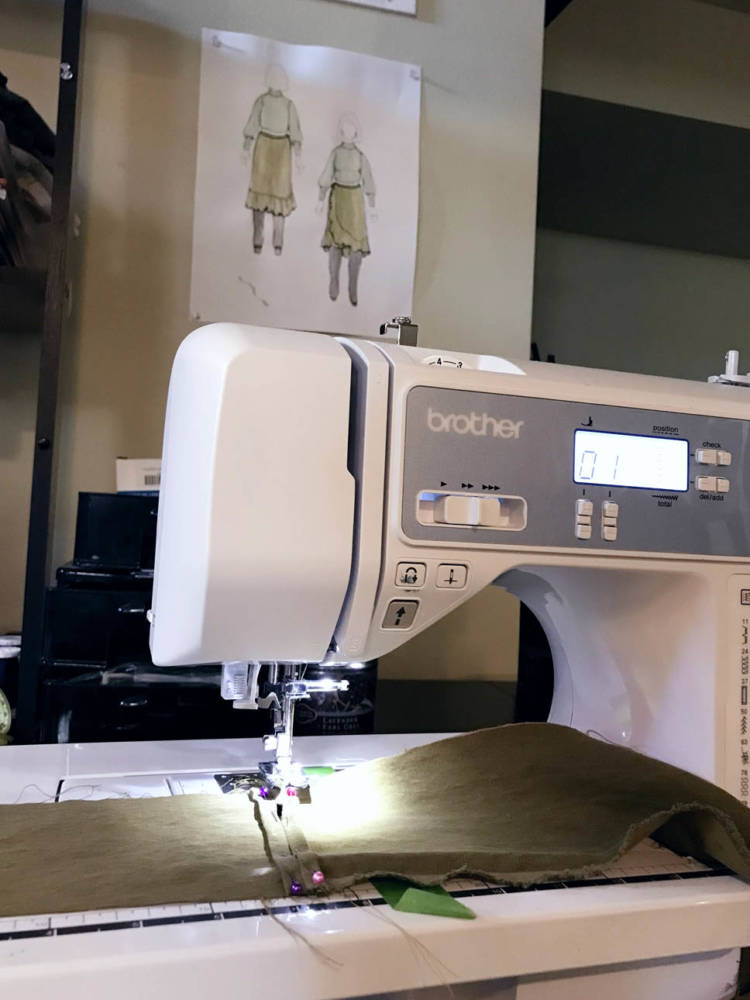
Keeping my MyBodyModel sketch of my current project on the wall is a great motivator and helps keep my imagination from wandering too much as I sew.
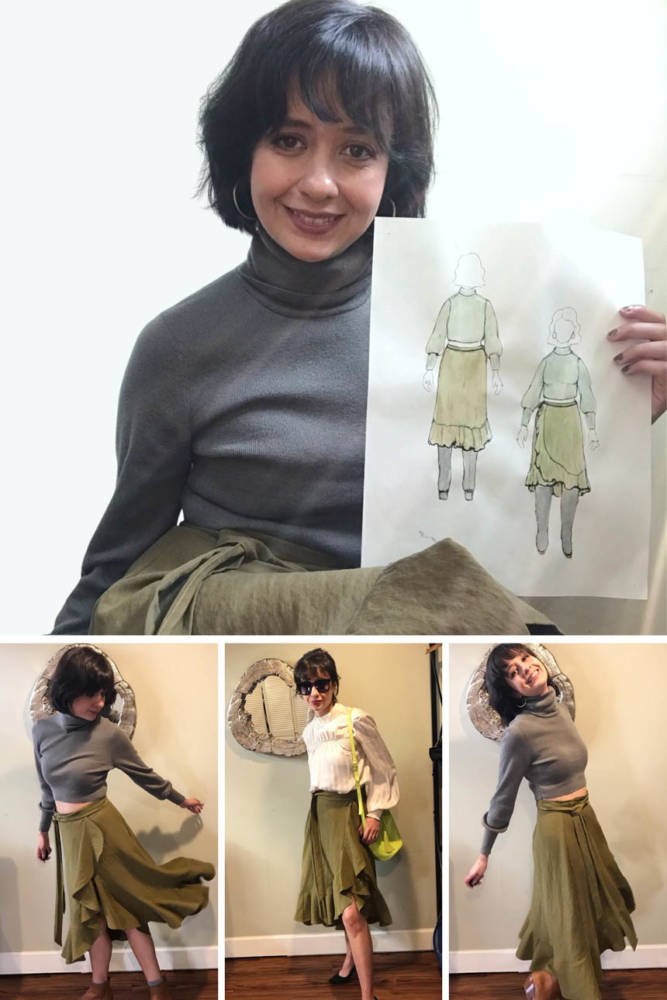
This wrap skirt turned out fantastic, and since I started with a drawing that paired it with a garment I already owned, I didn’t have to spend extra time figuring out what to wear with it.
Ultimately, sewing your own wardrobe should be fun and rewarding, as well as tailored to your body and lifestyle.
MyBodyModel really has been an indispensable tool in that process.

Amanda is a multi-passionate artist currently residing in Portland, Oregon. She’s practiced textile art, dyeing, costuming and makeup artistry, but didn’t venture into making clothes for herself until the 2020 pandemic. A history major and traveler, she finds inspiration from different eras in time and locales around the world. Outside of her creative adventures and a day job in tech, you can usually find her thrifting and trying to learn too many languages at once. See her makes on Instagram @AmandaLaFlaneuse and follow what inspires her on Pinterest @AmandaBlaFlaneuse.
8 thoughts on “My Sketching Process: From 9-Head Fashion Figures to Designing for My Body”
Thank you, Amanda for taking the time to share the details of your process and how it has evolved. For some reason, this is the first time that I have seen sketching clothes I want to make as a creative activity on its own. For quite some time now (years!) I have been trying to get back to the creative practice I enjoyed as a young person. Somehow, this feels like a very accessible way to do that. You have inspired me.
Also, I love that all the My Body Model blog posts include the pattern names of the garments sketched. I always see something that catches my interest.
You’re welcome Theresa, and thank you for your lovely comment. It can really be a challenge to maintain a creative practice over time; that makes me very happy to hear sharing was inspiring. Here’s wishing you a fun time with your fashion sketching adventures!
Wow! Such gorgeous sketches.
Thanks so much Reiko!
Hi Amanda,
I enjoyed your article and kept thinking. “She needs to publish this in the ‘Threads’ magazine.” I just received the current copy of Threads and the editor included an invitation for sewists to submit articles. I have been subscribing for a number of years and I haven’t seen any articles about using My Body Model. Enjoy your life and keep being a creative sewists.
Hi Glenna,
Thanks so much for the suggestion, that’s not something I had not thought of. I hope you enjoy your creative journey as well!
Hi Amanda!
Thank you for sharing your creativity with us, very inspiring!
Do you mind share the name of your sketchbook? Impressed that you can trace over your BodyModel with it and that you can also use watercolors on it!
Hi Linda, thank you so much! The sketchbook is a Strathmore Vision Sketchbook; it’s not meant for painting and does get a little rumply when you apply water, but nothing too noticeable.