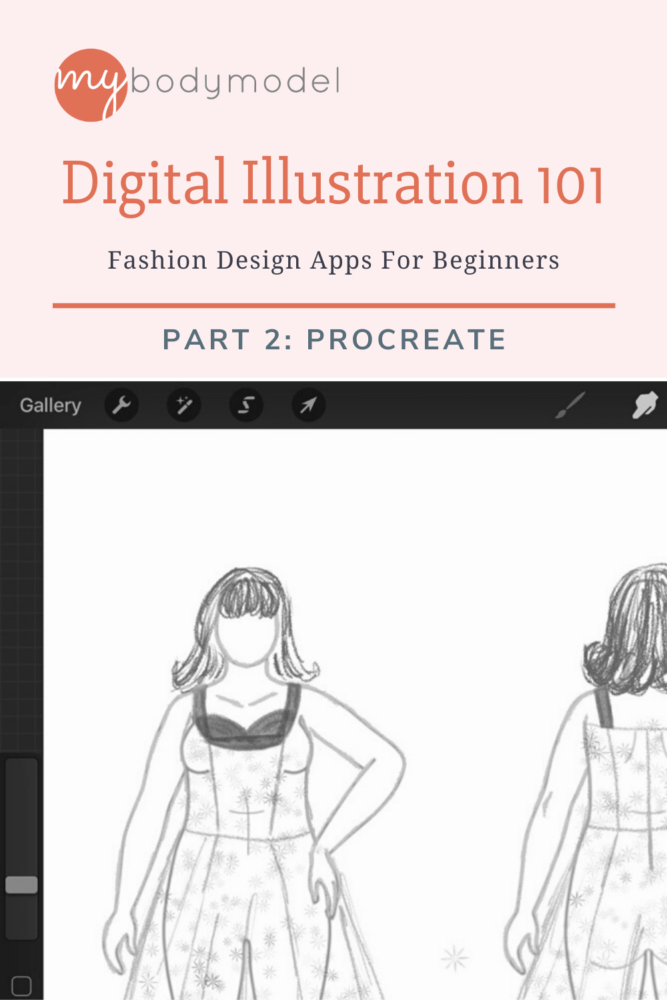
Last week, Doctor T shared a detailed step-by-step tutorial in “Fashion Design Apps for Beginners, Part 1: Adobe Fresco.” In Part 2 of this series, she shares the process of creating a dress design sketch on her MyBodyModel custom fashion croquis by exploring the various tools and features of the Procreate drawing app.
This week we will continue our drawing tutorial series and look at some more advanced features that can be helpful when using a drawing app! I recently got a My Body Model croquis for my sister, whom I have often sewn for, so today I’m going to use the Procreate app to design a party dress for her. As before, I will be using my iPad Pro and Apple Pencil, which is the platform that Procreate was designed to work with.
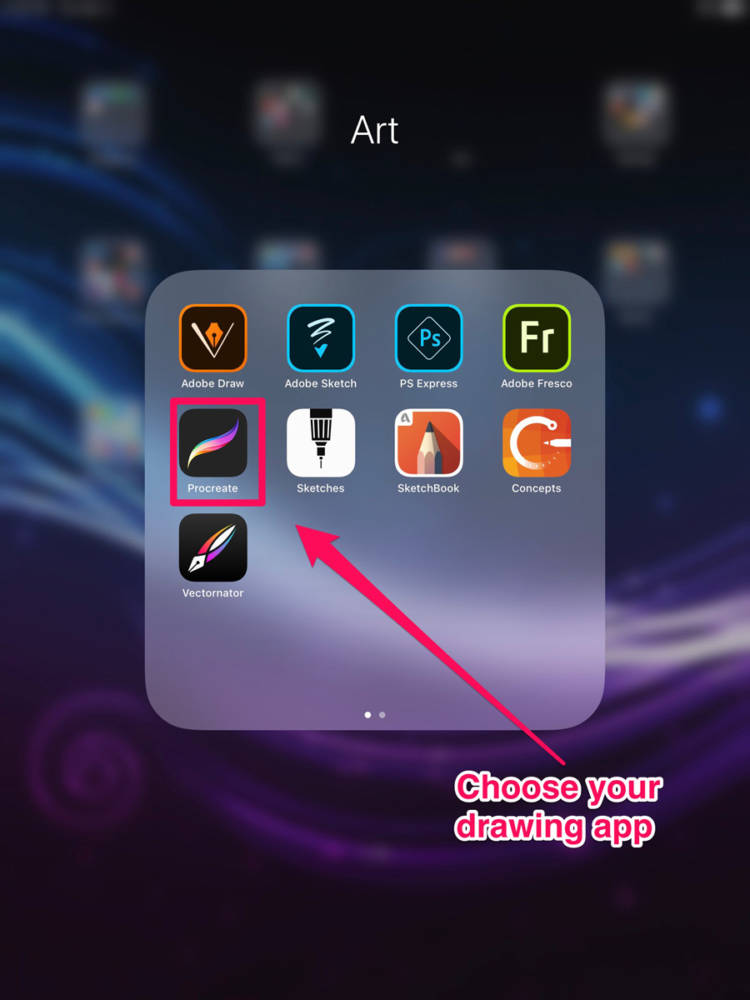
You can also try these digital drawing techniques using any free or paid drawing app, and any smartphone or tablet and stylus. If you’re not sure where to start, check out the 9 different apps that I reviewed in this blog post.
Step 1: Choose your favorite drawing app
Of course, we will start at the very beginning by opening our drawing app.
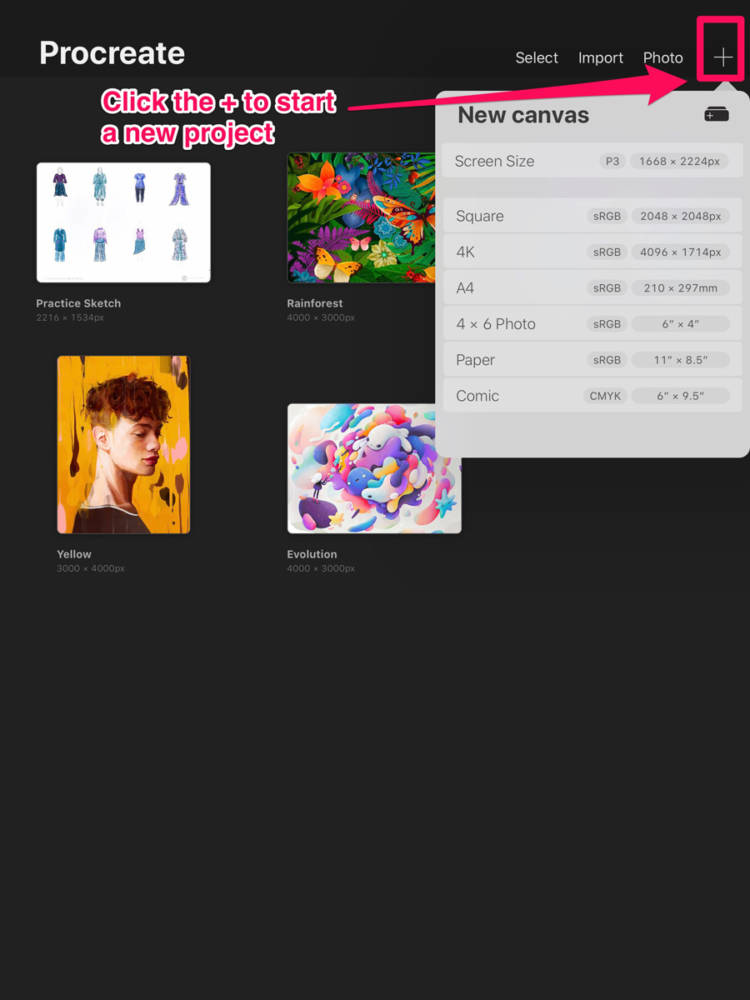
Step 2: Open a New Document
In Procreate it’s very easy to start a new document using the “+” button. I’m using all the default settings because I don’t plan on using this anywhere other than for digital media, so I don’t need to make a particularly large image.
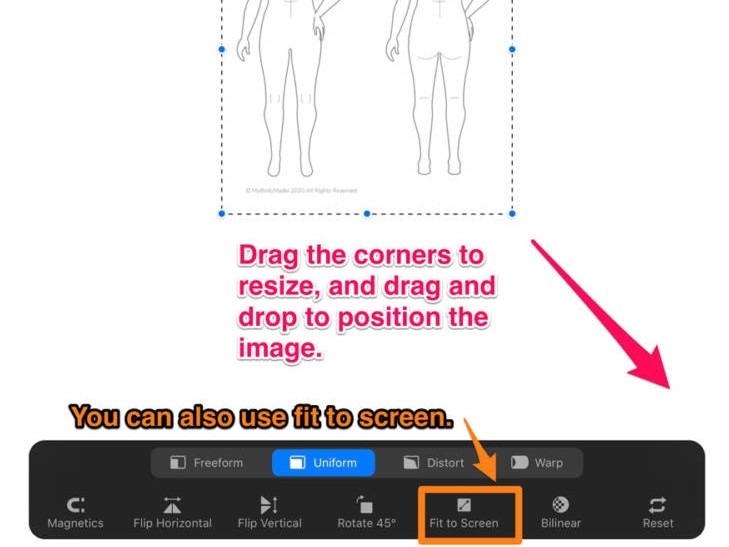
Step 3: Import My Body Model Croquis
As with last week’s tutorial, in order to import your My Body Model Croquis, you will need to have it saved somewhere that the app can access it. Personally, I like to save these images in the Files section of my iCloud storage because it is easy for the app to access. You can also import from your Photos folder.

Once you have imported your croquis, drag one of the corner dots to resize the image, or use Procreate’s Fit to Screen feature to enlarge the croquis image.
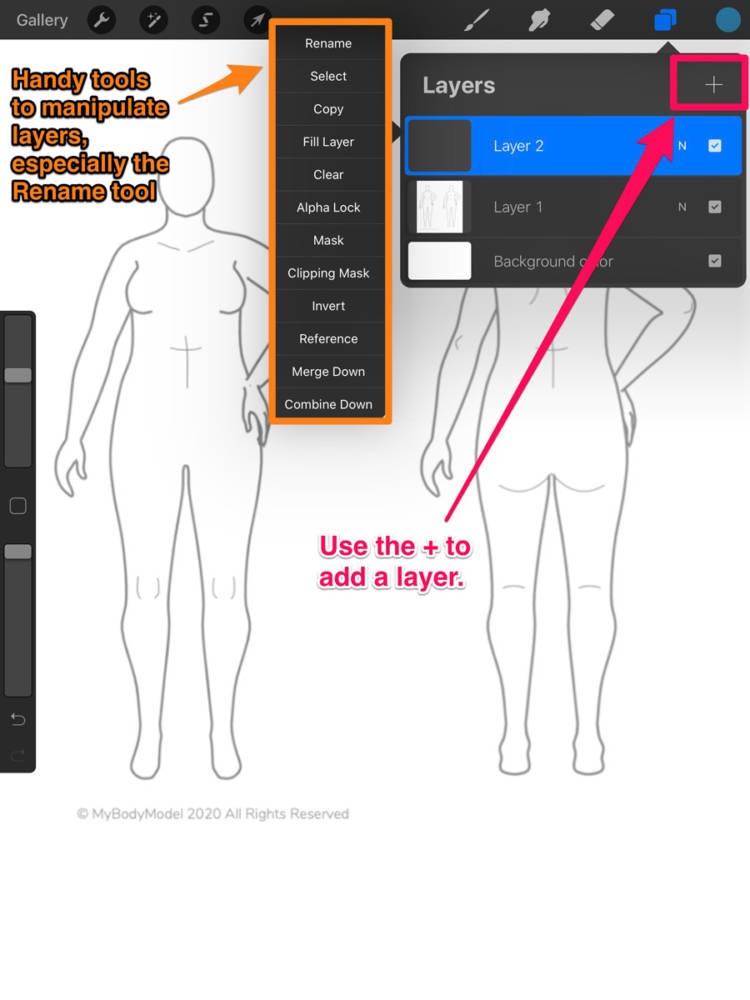
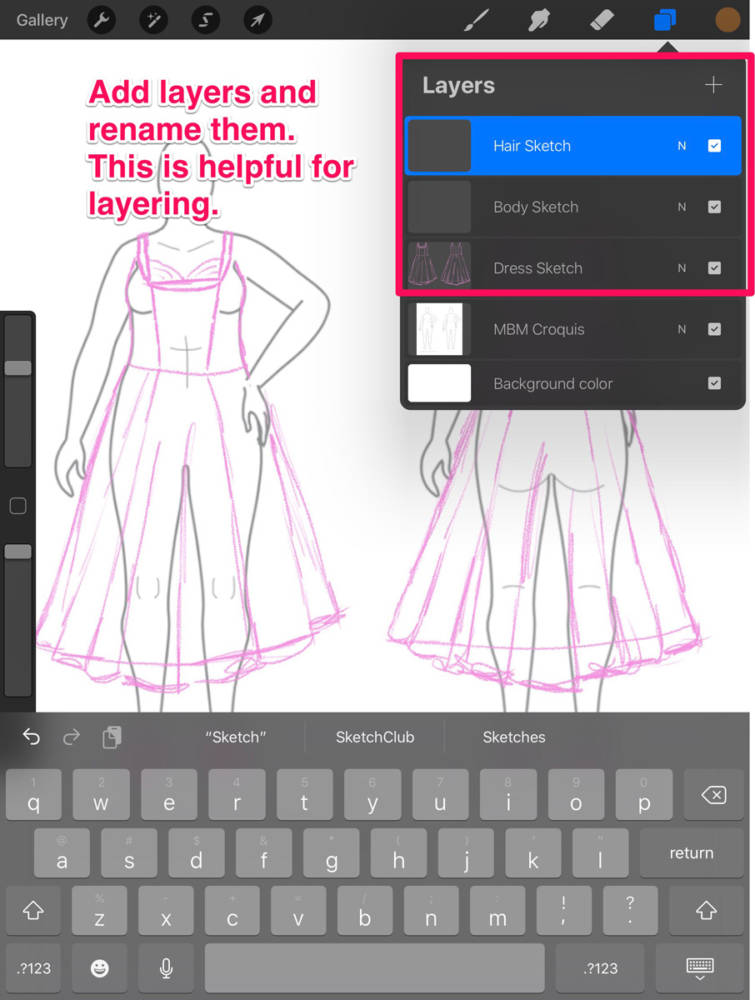
Step 4: Create a New Layer
As before, we are going to take advantage of the layers feature to build up our final image. In Procreate, the layers tool is located to the upper right, and when you click the “+” to add a layer, it gives you a lot of options to rename, modify, or copy that layer.
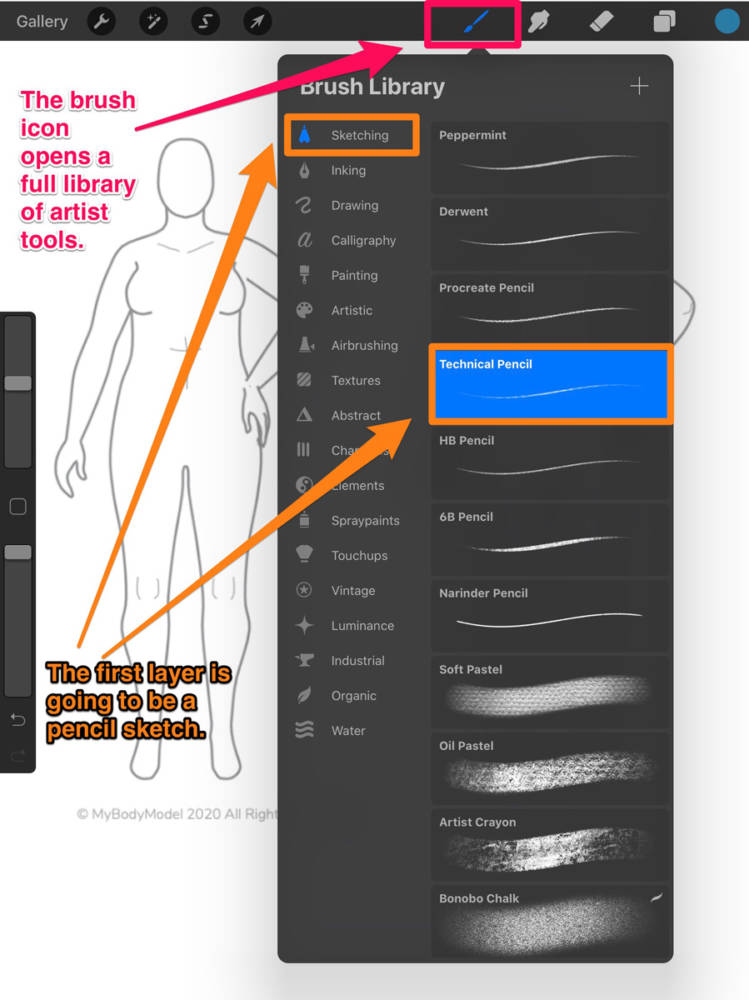
Step 5: Select your sketching tool
As with last week’s tutorial, I’m going to start sketching with the pencil tool. Procreate has a lot of different art tools, categorized by their real-world use. Within the Sketch category, there are many different styles of pencils, so you might need to experiment to see what you like best. Personally, I like the “Technical Pencil” because it is very thin and like a mechanical pencil, which is my real work writing utensil of choice.
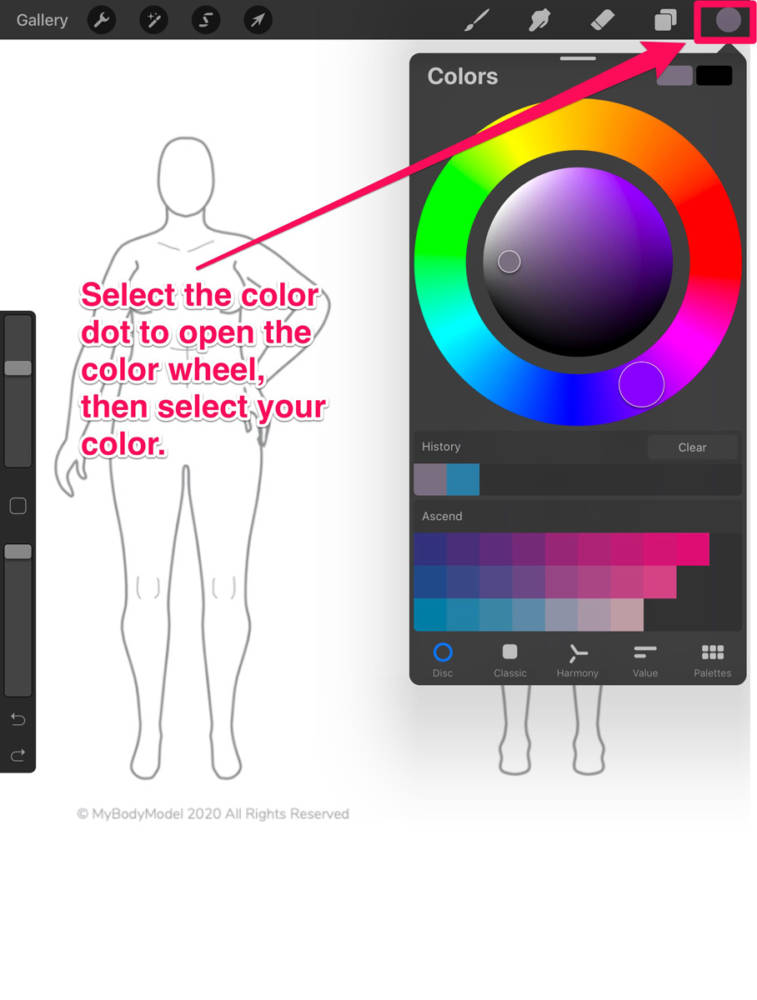
This week, I’ve decided to use a colored pencil to help the sketch stand out more from the croquis. The color controls in Procreate are found in the upper right corner. I will change colors a lot throughout this tutorial, but every time I do this it is using the wheel in the upper corner or choosing a recent color from the list below the wheel.
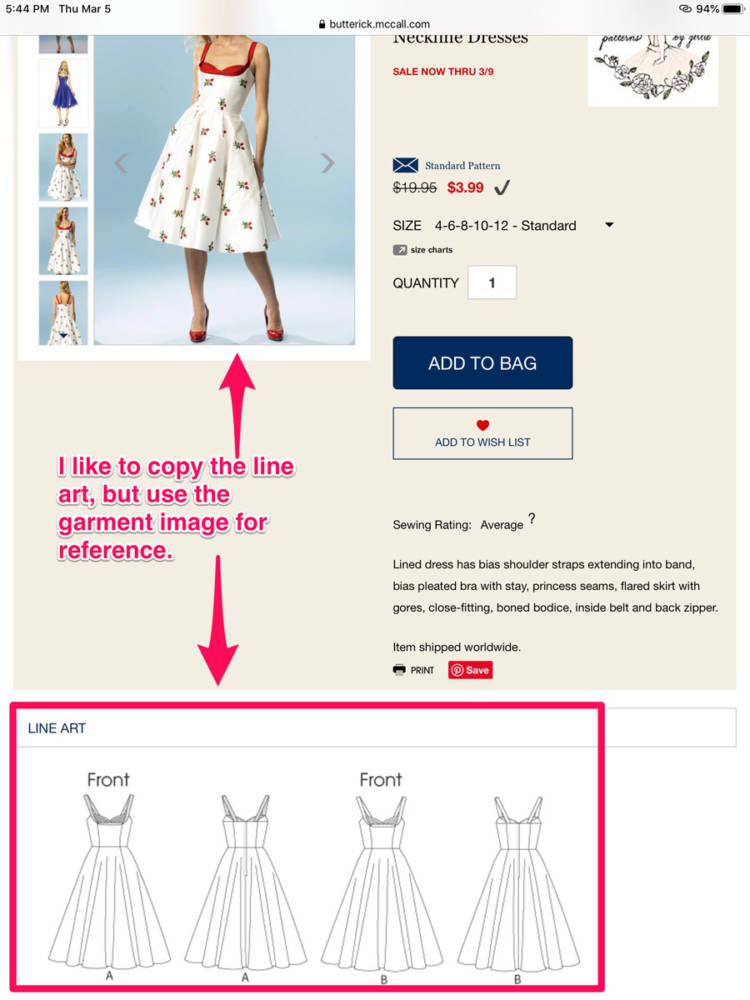
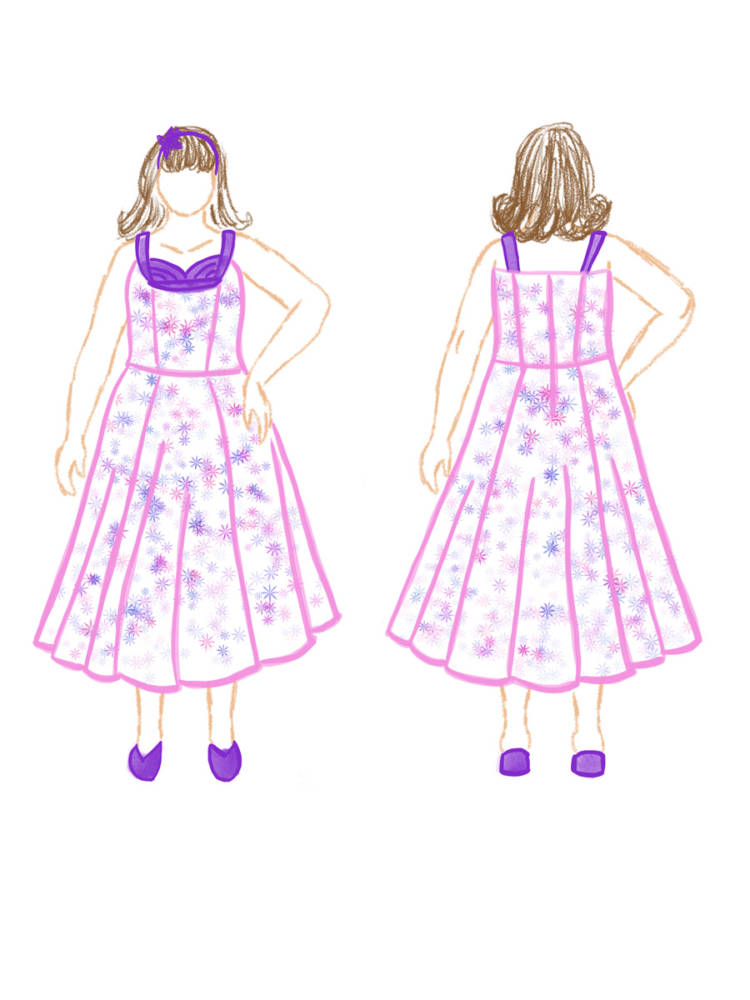
This week I’m going to sketch a party dress for my sister. I find the best reference is the line drawings, which you can often find on the brand’s website.
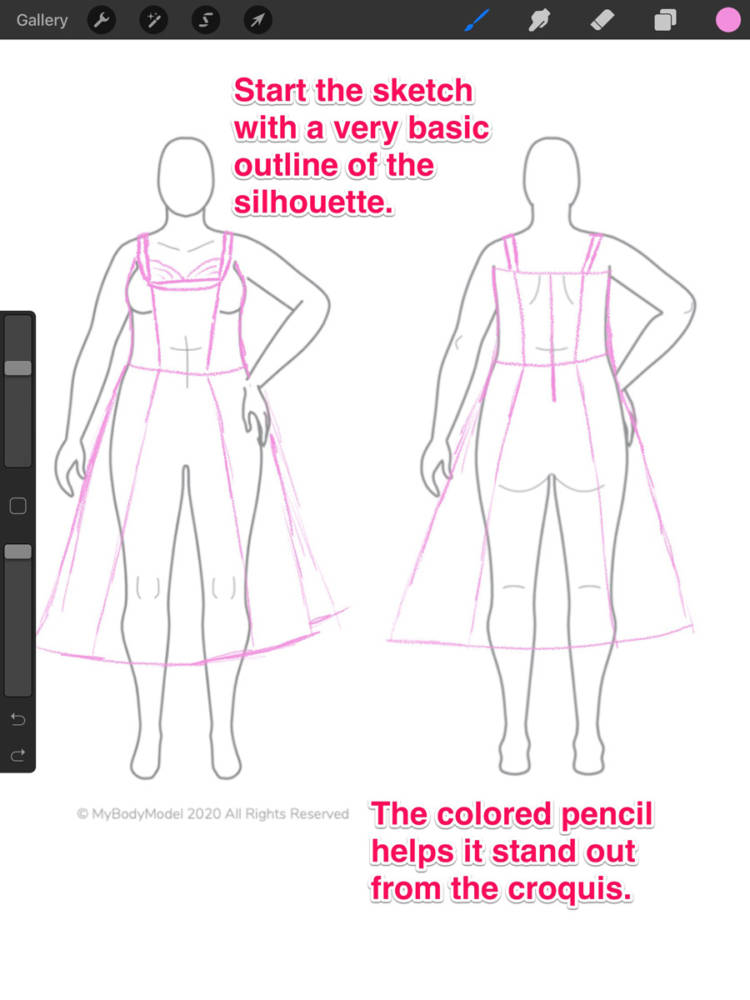
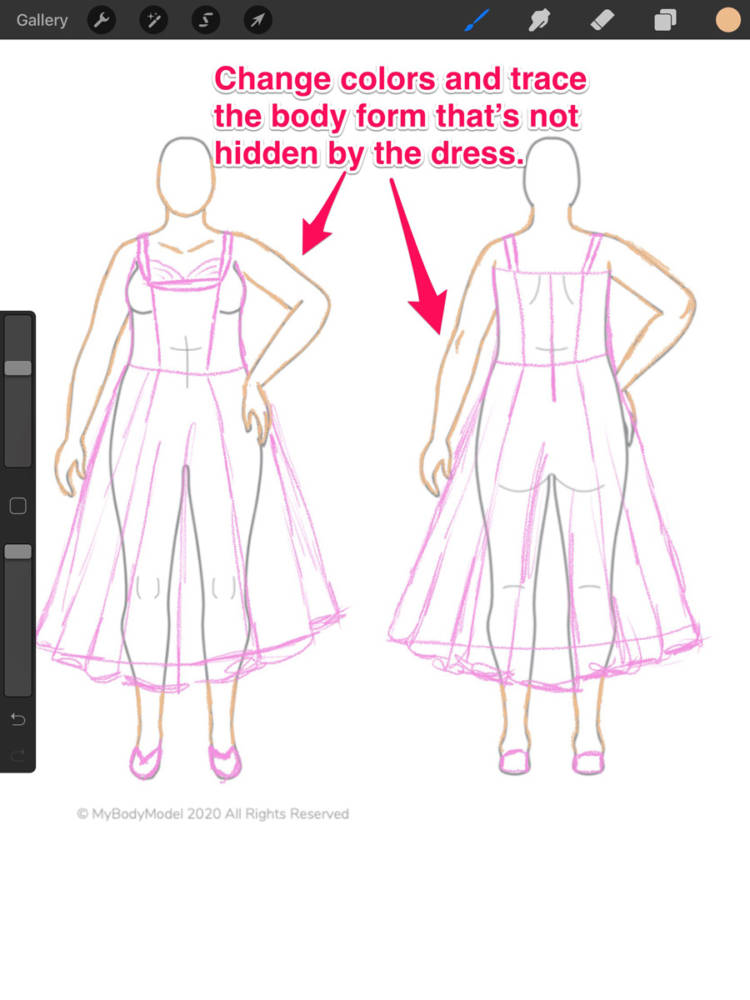
Step 6: Start sketching
Since this dress has a bit of detail on the bodice and the skirt, I’m starting my sketch by making a really basic outline of the silhouette.
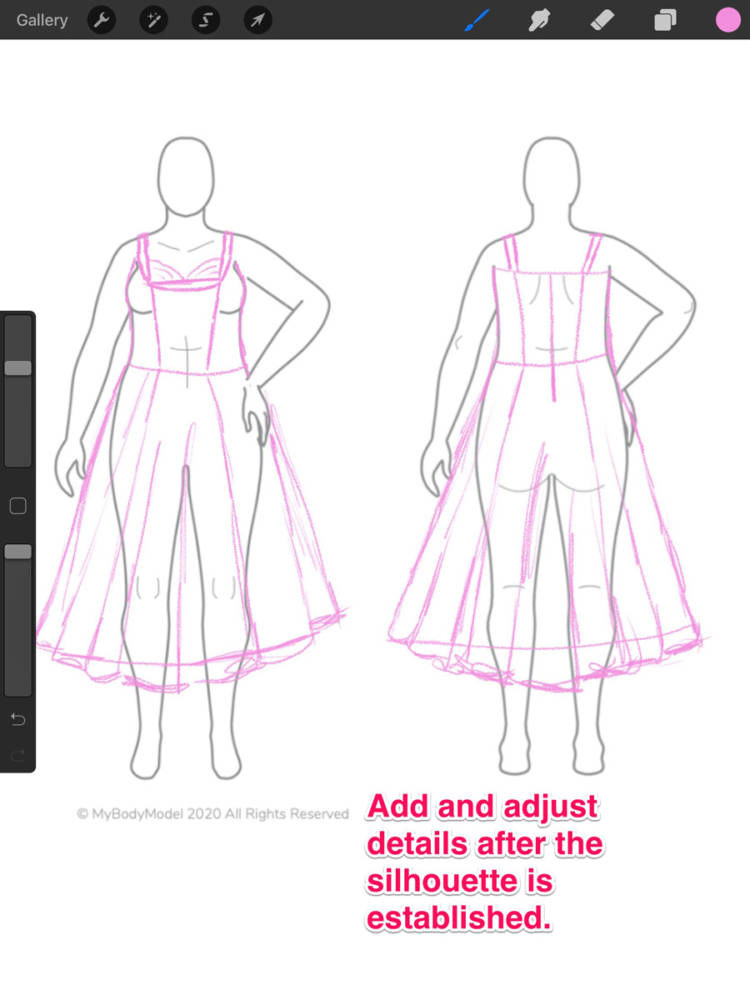
Next, I’ll go in and add a bit more detail. It doesn’t need to look perfect – we can turn off the sketch layer at the end of the process, or we can erase stray lines after we have a better sense of the image we want to make.
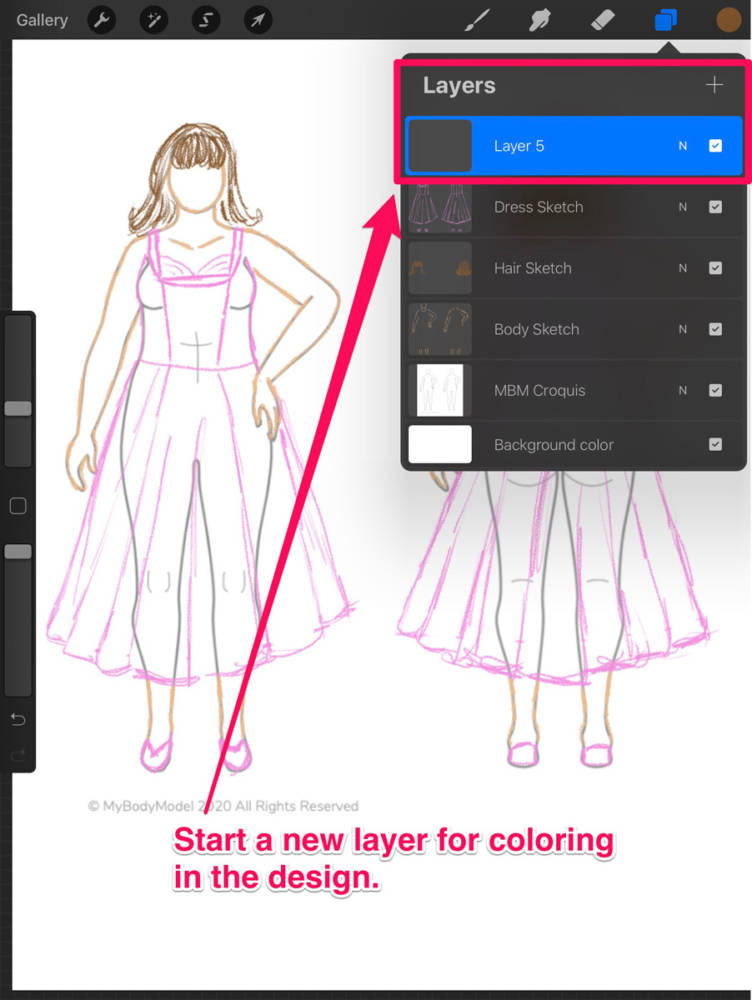
Next, I’m going to add more layers so that I can keep the dress, body outline, and hair separate.
I’m also going to keep playing with color as well – using a peachy brown for my sister’s skin tone and a light brown for her hair color.
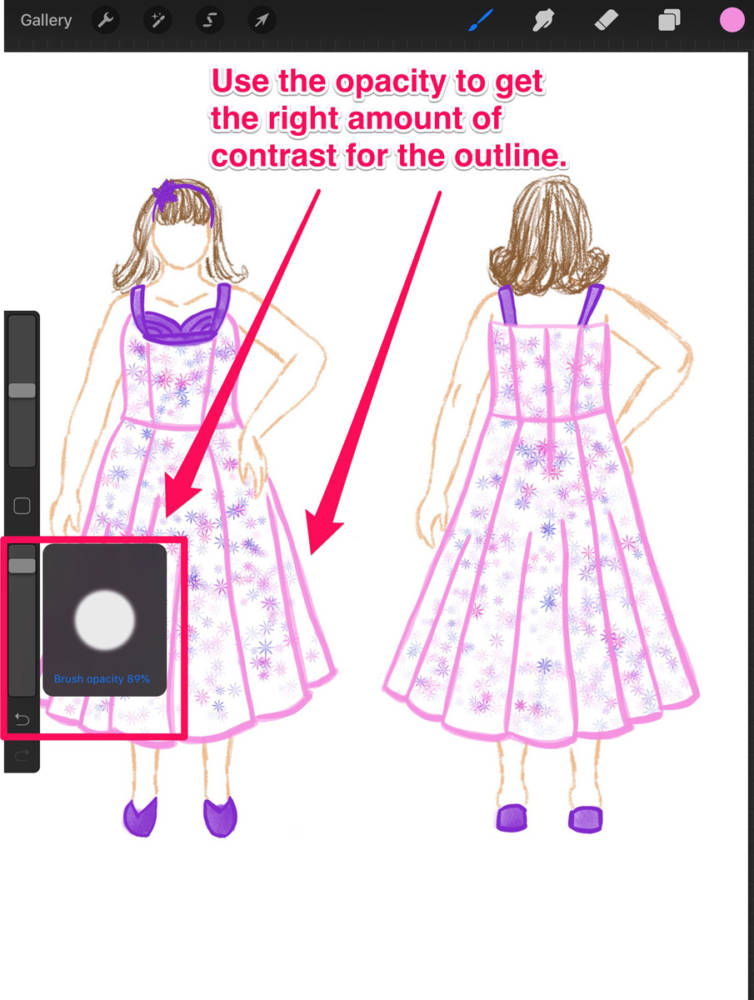
Playing with the brush features of size and opacity also help get the feel of the sketch just right.
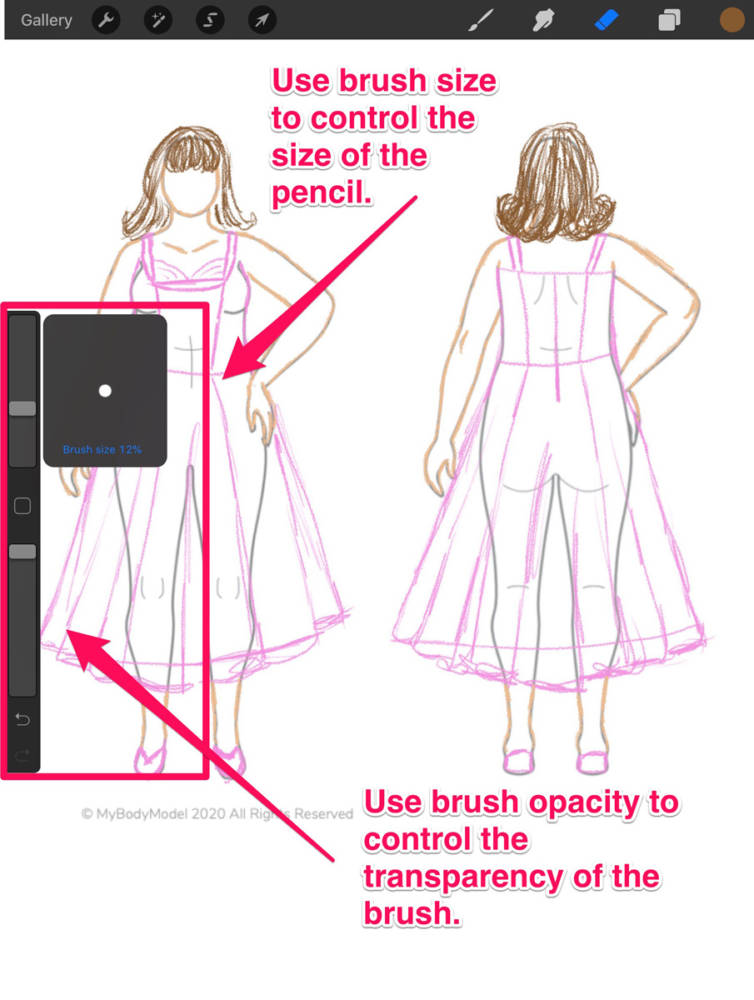
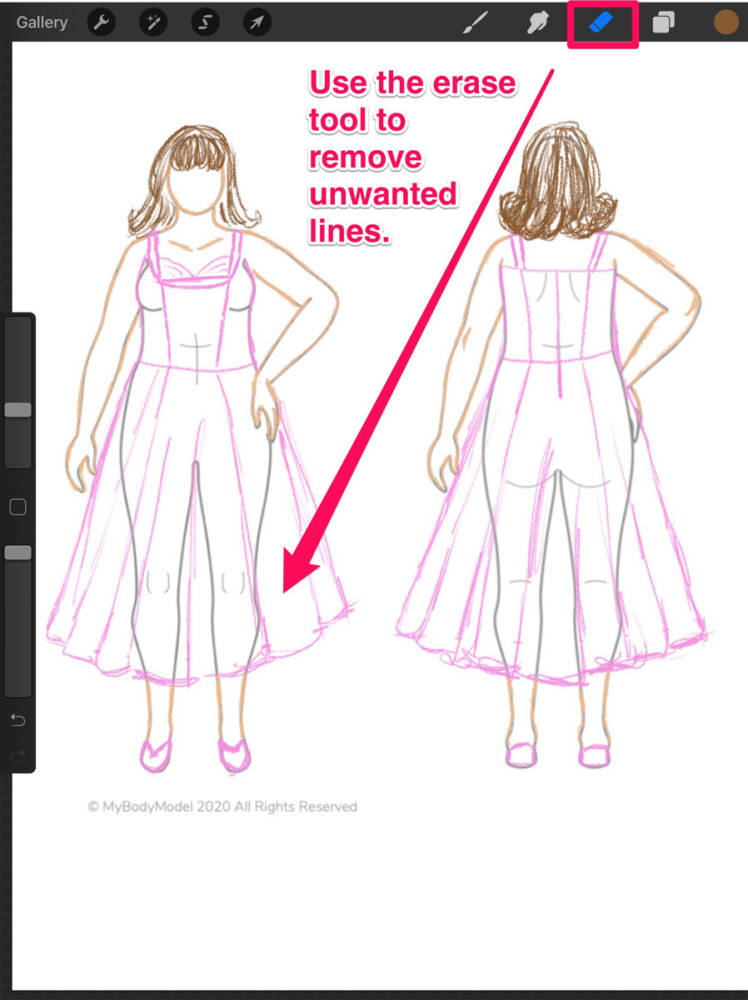
Don’t forget that you can erase anything you don’t want to keep!
Step 7: Color it in
I really like the inspiration dress from Butterick, so I’m going to copy the idea to mix print and solid fabrics. Although my sister looks great in red, she really loved purple, so I’m going to use that as the solid color. While I could use my colored pencils to fill in the sketch, I think I’m going to play around with the other tools offered in Procreate.
Don’t forget that you have a lot of brush tools at your disposal! If you don’t like the way one looks, erase it and try something else.
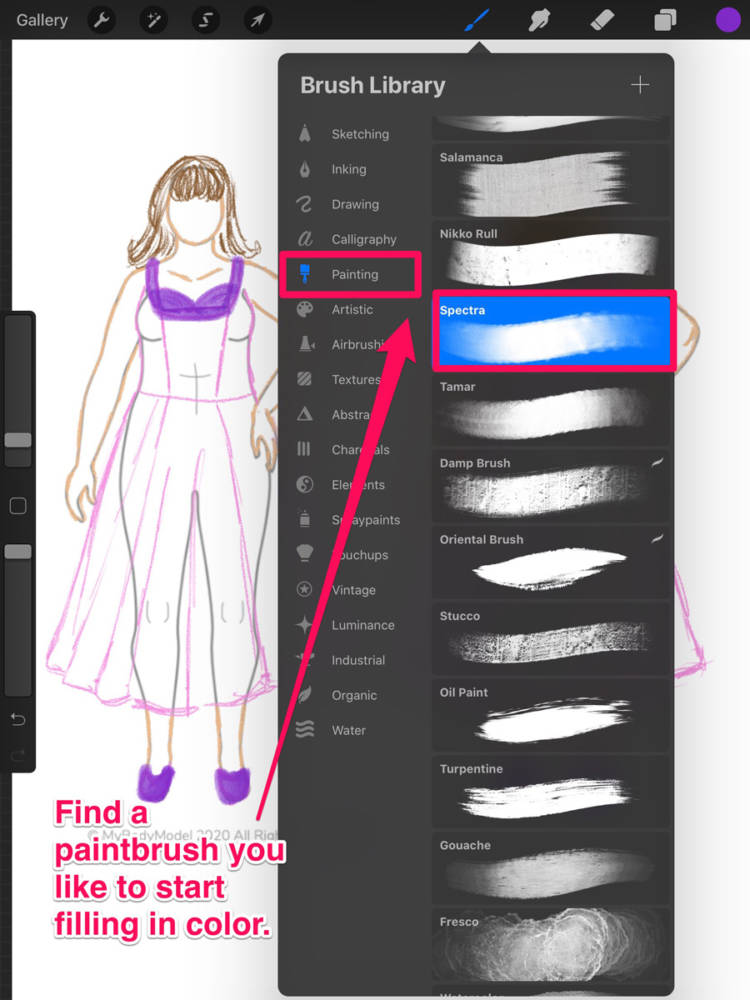
For the “print” fabric of the dress, I’m going to play with some of Procreate’s coolest brush designs. In the “Vintage” category, there are a lot of pattern brushes that can be really helpful in creating quick sketches of print fabrics.
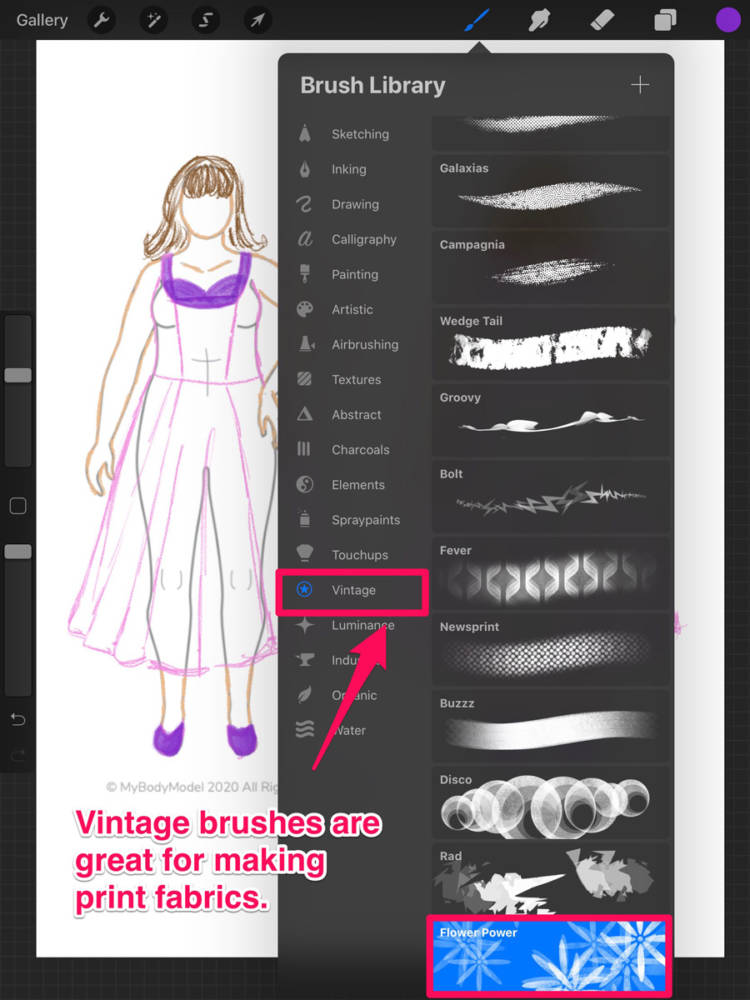
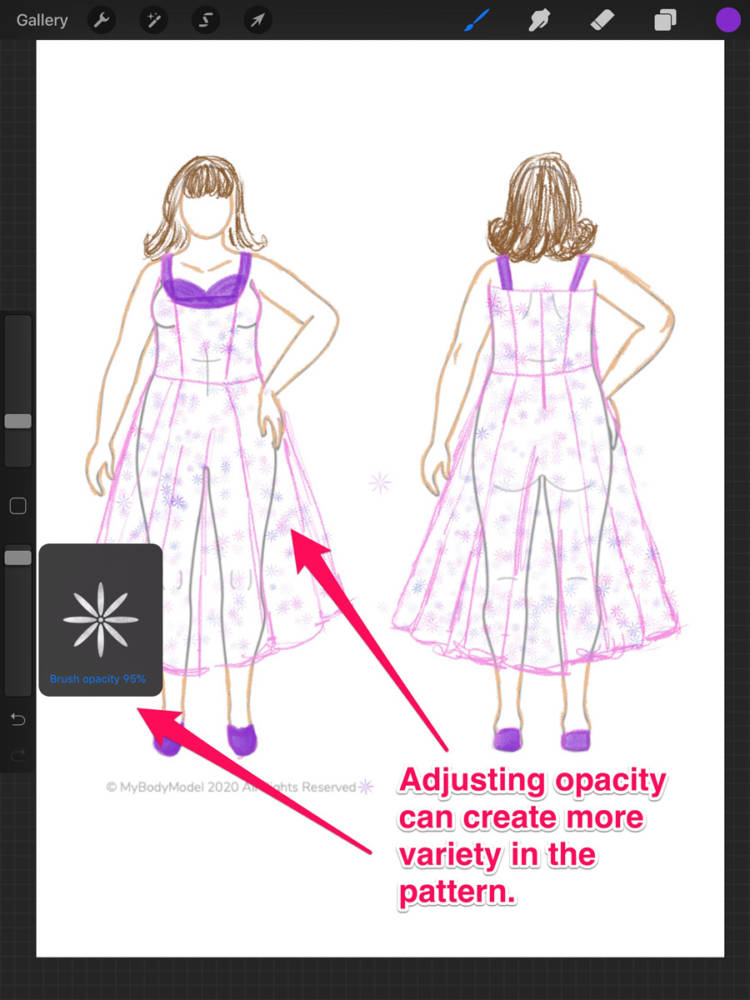
I also make sure to do several passes with the brush set to different sizes and different opacities to create a more textured looking print design.
Step 8: Final outlines
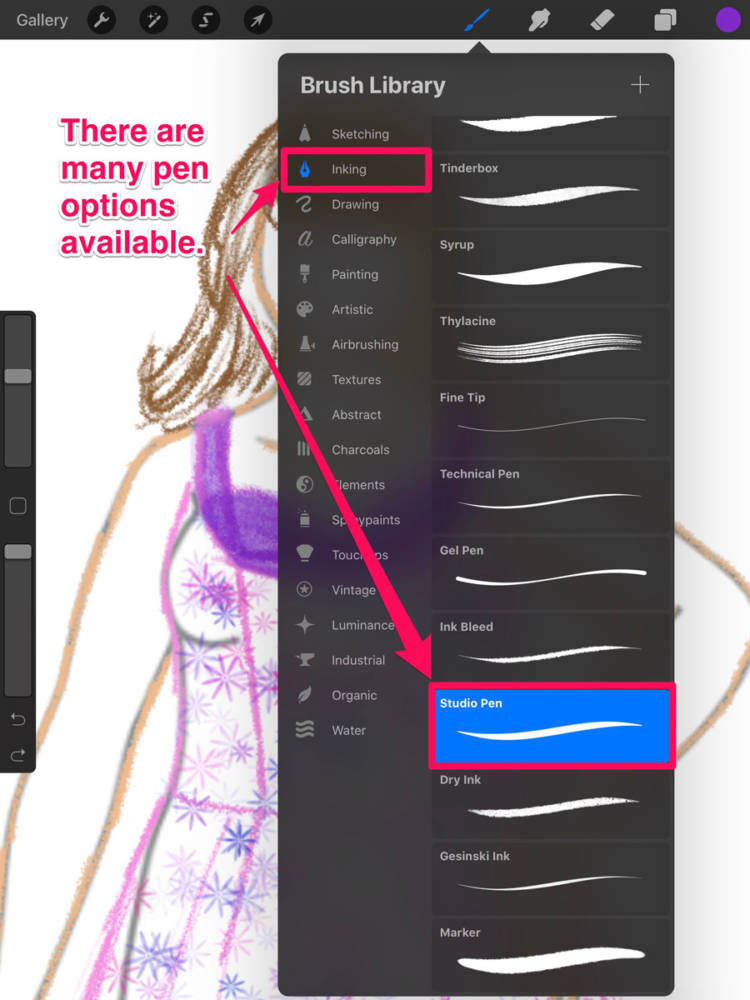
I really want the dress to pop, so I’m going to ink the outline of the dress sketch using one of the “Inking” pens in Procreate. Of course, I’m going to make sure to use a new layer!
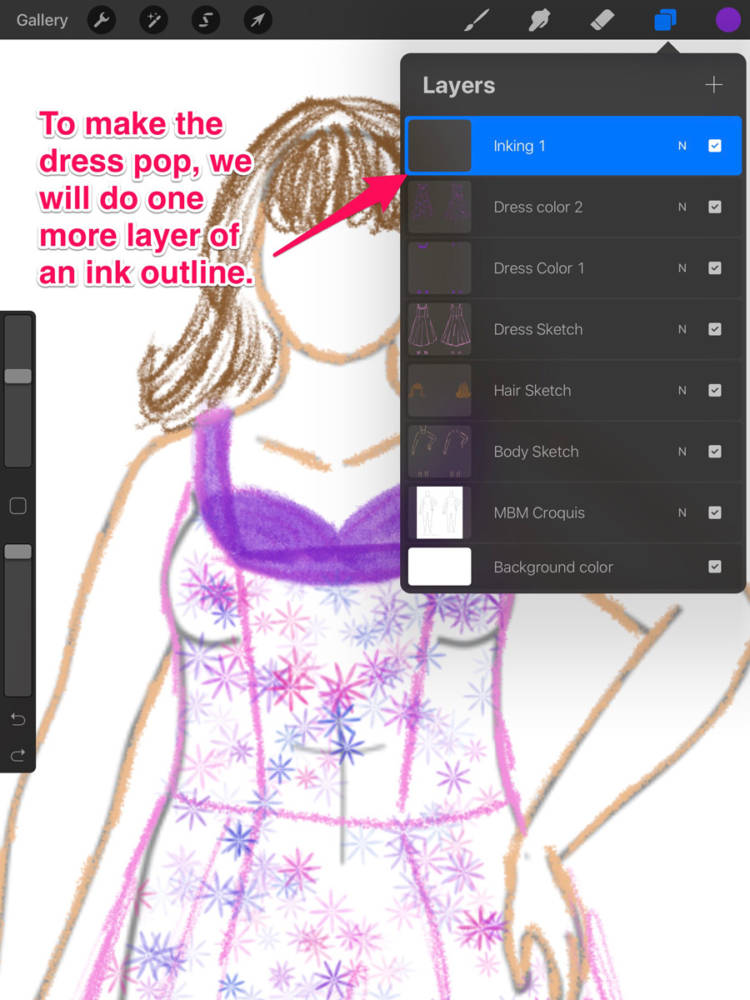
Procreate has lots of ink brushes available too! I tested out several before settling on one that I liked.
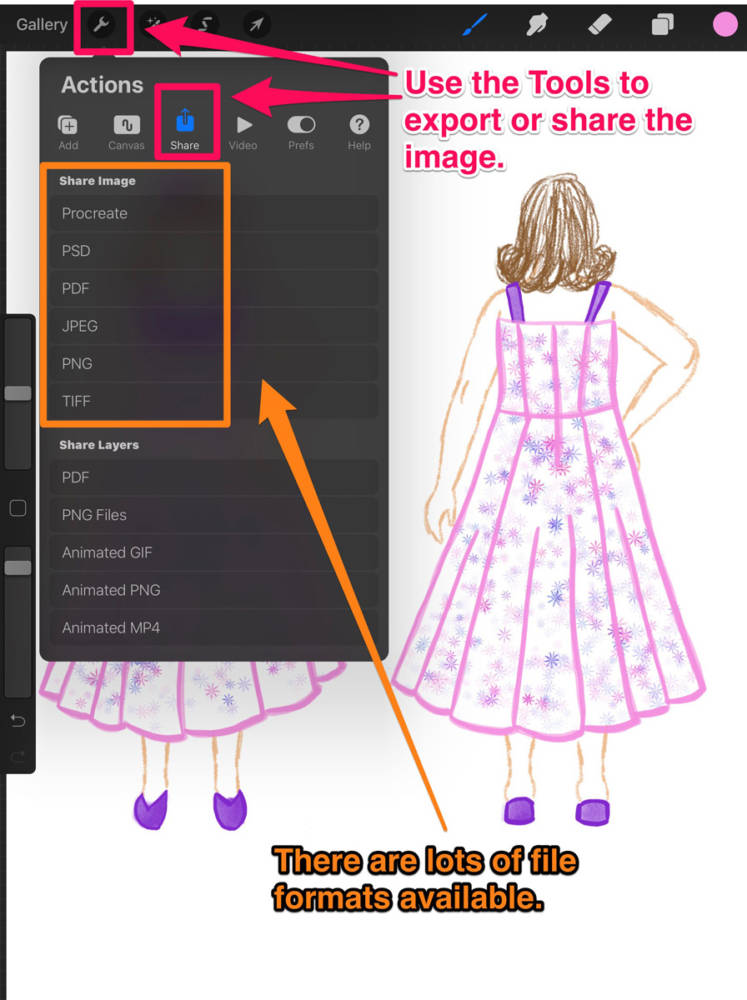
Step 9: Export your image
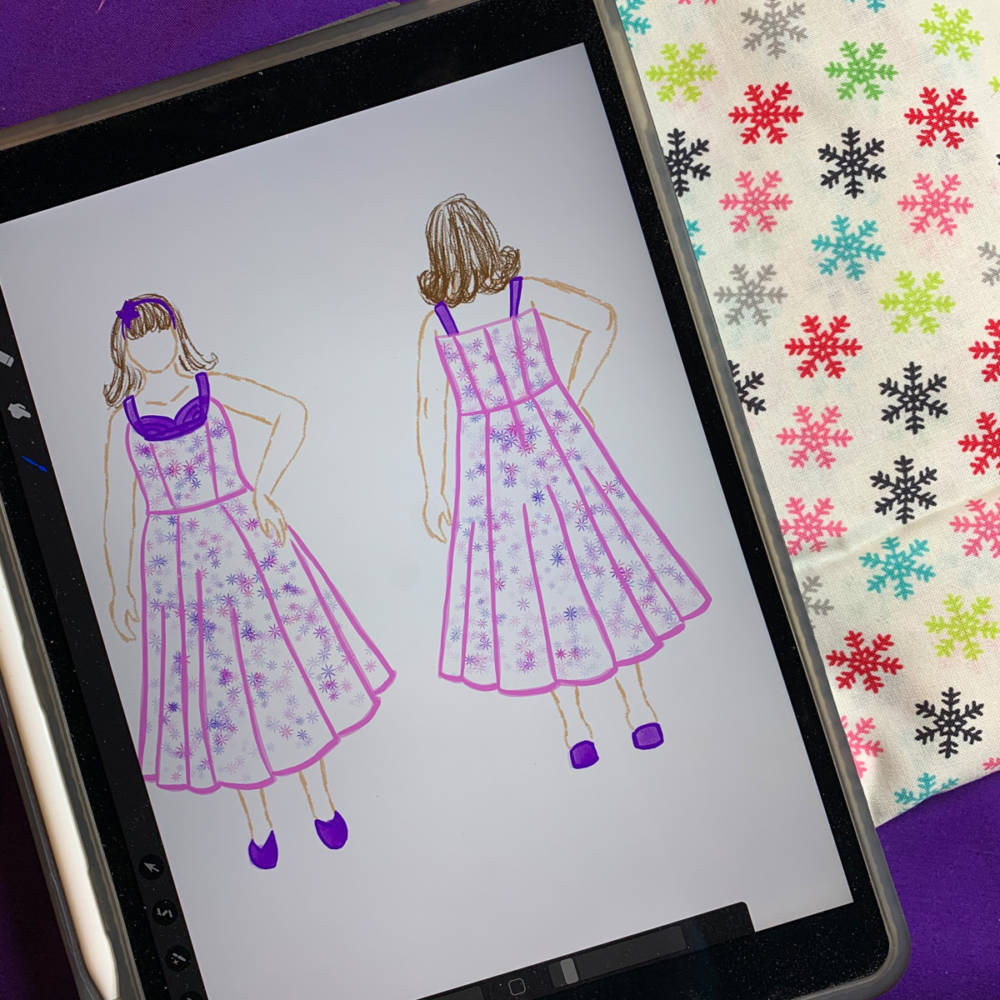
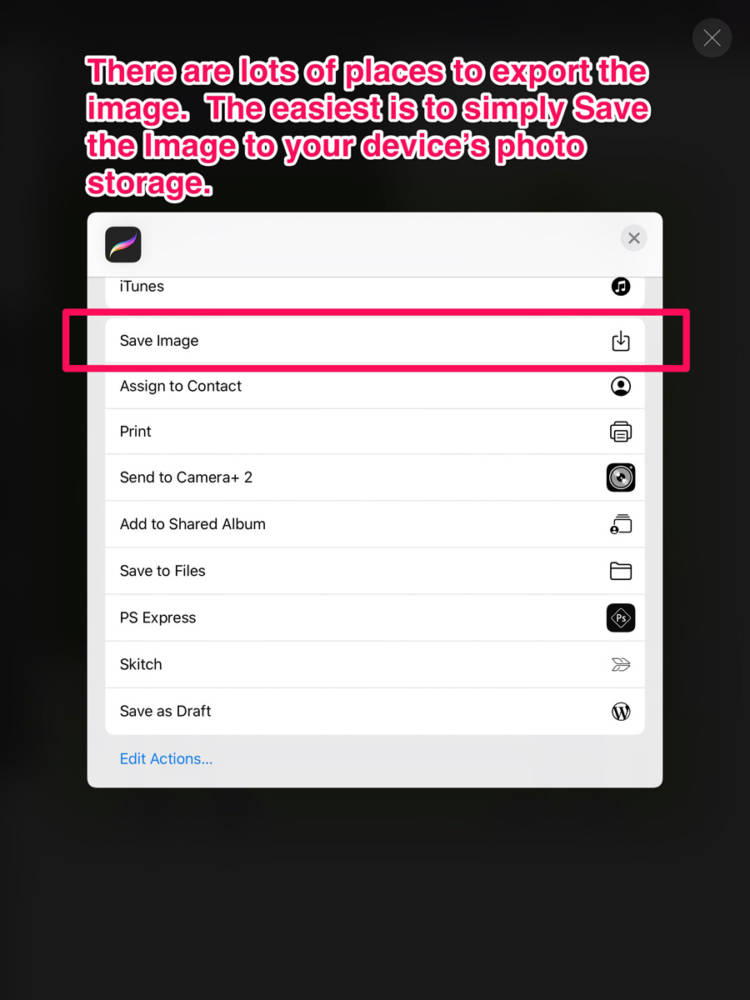
Finally, it’s time to share! I’ve turned off the My Body Model original image as well as the pencil sketch of the dress. I really wanted the dress to be the focus, so I’ve left the traced outline of the body and the hair as-is with the colored pencil sketches. I’ve also left the model faceless to really emphasize the dress. The last step to export your image to share or use it for garment planning.
And that’s it! We are now ready to share our image – and I’m ready to show my sister the party dress I designed for her!
Conclusion
And that’s how you use Procreate! As you can see, many of the features are very similar to those available in Adobe Fresco, though Procreate has a lot more brush options, which are grouped more by how the tool would be used in real life. Procreate also offers the really fun Vintage pattern brushes, which are great for drawing print fabrics. Although Procreate might be a bit more complex, the steps are very much the same as we saw in the more basic tutorial. Once you have the basics down, it really is more about experimenting with different tools and seeing what sort of styles and aesthetic you like to create. And now that we’ve seen how to create a garment, next time we’ll take it one step farther and see how to create a full wardrobe!
Are you ready to give digital fashion drawing a try on your tablet? Check out MyBodyModel’s step-by-step video course for beginners, “Digital Paper Dolls” at Illustrated Style School and learn to draw digitally on your tablet using the free app, Autodesk Sketchbook for iOS (Apple) or Android.
For more digital inspiration, check out these posts:
- Digital Fashion Inspiration: 5 Ways to Design an Outfit
- Fashion Design Apps for Beginners, Part 1: Adobe Fresco
- 9 Drawing Apps for Digital Fashion Illustration with MyBodyModel
Did you enjoy this tutorial? Please pin and share!

Doctor T works in education creating digital classroom spaces, but tries to find the time to put into her hobbies of sewing, blogging, lightspeed saber fencing, and judging competitive roller skating. She started sewing because of a desire to cosplay and make skating costumes, but has become enamored with the idea of sewing her own wardrobe. You can find her on Instagram @doctortdesigns or on her blog.